Quantcast
Channel: Vegetarian – Our Paleo Life
Viewing all 77 articles
Browse latest View live

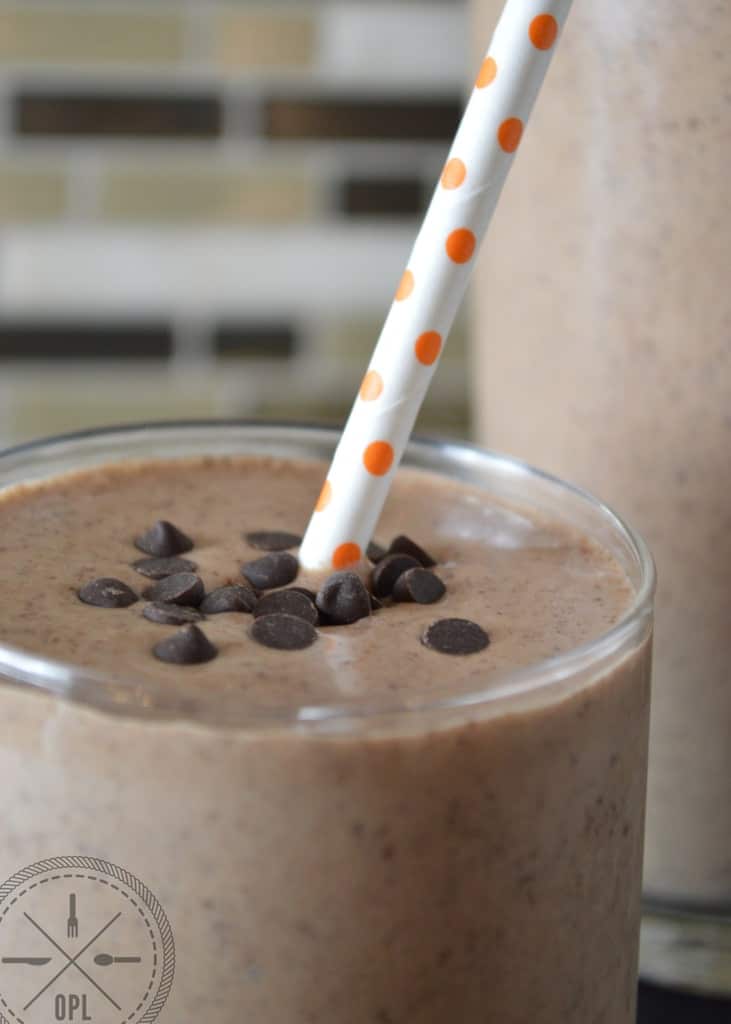
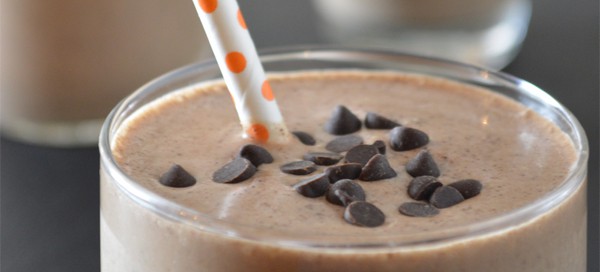
Elvis Smoothie

$
0
0

Elvis Smoothie (almond butter, banana, & chocolate) | Our Paleo Life

I used to be a smoothie-aholic. Is that a real thing? Doesn’t really matter, but I had a serious addiction. I would make smoothies for breakfast, smoothies after the gym, and smoothies before bed. Um, all in one day sometimes. Bad stuff. Sure, I would add spinach and think “wow, I’m being so healthy, drinking my veggies”. But I eventually came to realize that there was a purpose behind actually chewing your food, and that drinking foods that were meant to be chewed was really doing myself a disservice.

We did the whole veggie juicing thing, and it was great, but I really feel strongly about actually eating (not drinking) the bulk of your food. Here are just a few reasons why it’s better to chew instead of drink your food:

  • Aids in digestion by not only breaking down the foods into smaller particles, but by producing enzyme-rich saliva.
  • Chewing takes longer than drinking, therefore taking longer to complete a meal. This equals a smaller quantity of food consumed. Chewing is nature’s portion control!
  • You actually get to taste your food. Nature provided us an amazing array of flavors. Take the time to enjoy them.


Elvis Smoothie (almond butter, banana, & chocolate) | Our Paleo Life

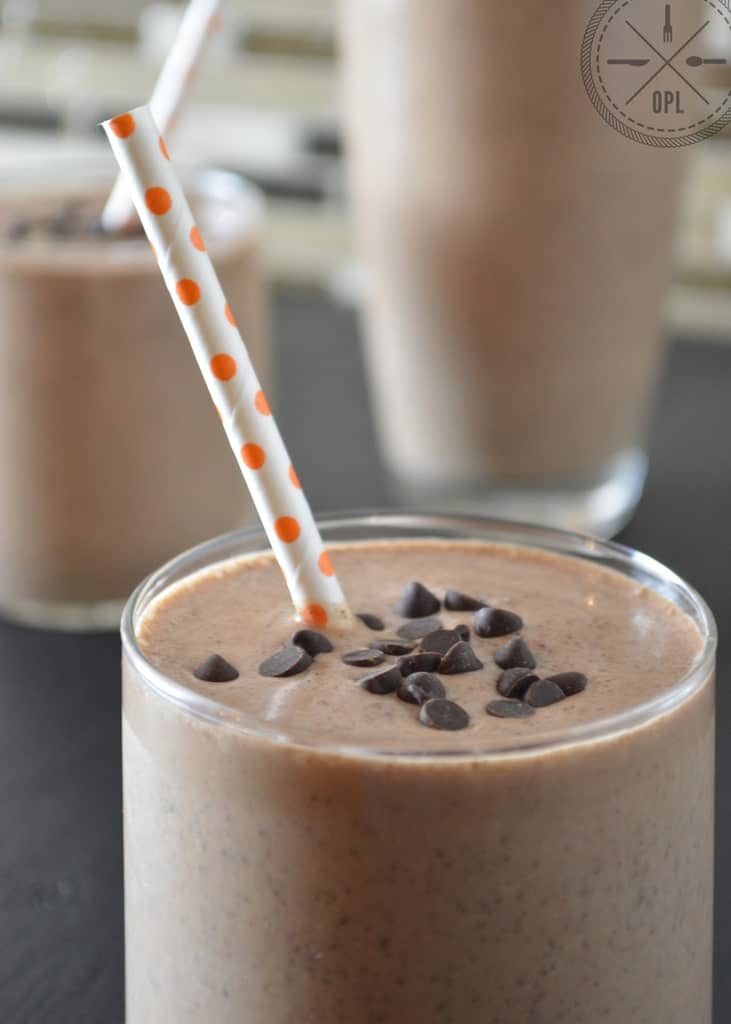
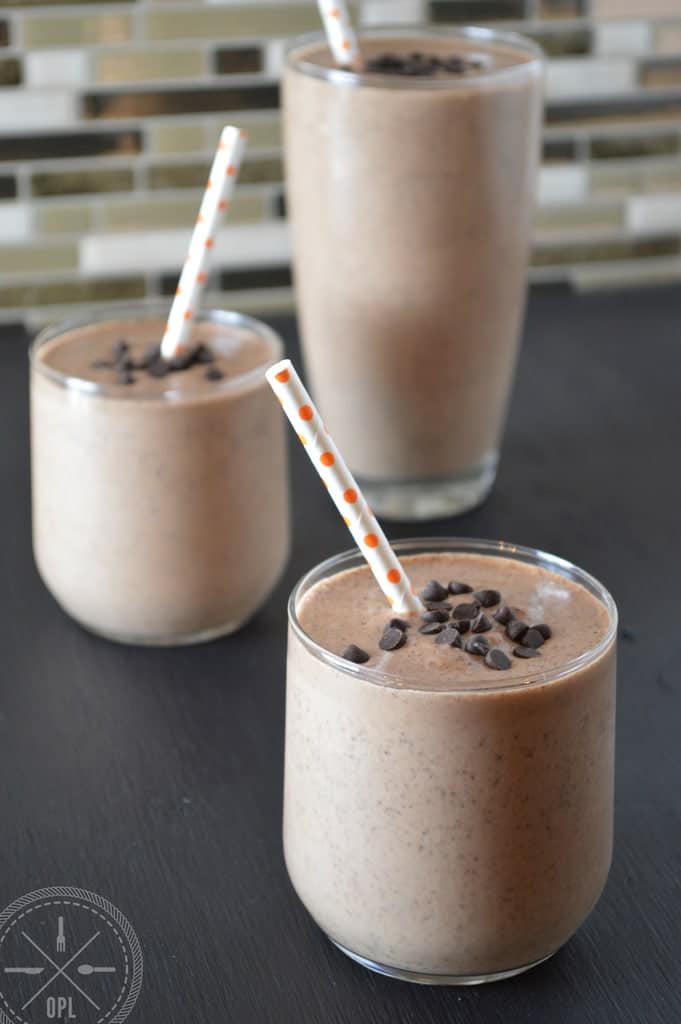
Isn’t this drink so cute with the little chocolate chips on it? Yeah, not so cute when I was
pouring it and it spilled out all over the table and cloth napkin. This is smoothie photo ‘Take 2′.

So why on earth am I making a case against drinking food on a post about a smoothie? I just want to point out that while I do enjoy a smoothie every once in a while as a treat, I don’t consume them as a meal replacement. Been there, done that, realized the error of my ways. If I wouldn’t sit down and eat 4 carrots, an entire bunch of kale, 2 beets, and 2 apples in one sitting, why would I drink that much at one time? Just eat your fruits and veggies at every meal and you’re going to get what you need.

Elvis Smoothie (almond butter, banana, & chocolate) | Our Paleo Life

But this smoothie isn’t a meal, it’s totally a treat. And it makes a lot, so if it’s just for you, split it in half. And don’t forget, if you make too much (whether by accident or on purpose), just fill up some popsicle molds and freeze them. Maybe even toss in a few extra chocolate chips for fun. This smoothie makes delicious popsicles, and my kids love them. They got a frozen chocolate treat and I’m happy they’re not eating some chemical-filled junk from the store. Double win.

Elvis Smoothie (almond butter, banana, & chocolate) | Our Paleo Life

Fast and Easy Paleo Recipes

View Full Recipe

Click the button to see the exact, printable recipe with ingredient list, instructions and timer.

Recipe: Elvis Smoothie

The post Elvis Smoothie appeared first on Our Paleo Life.


Chocolate Hazelnut Tart {paleo, vegan, raw}

$
0
0

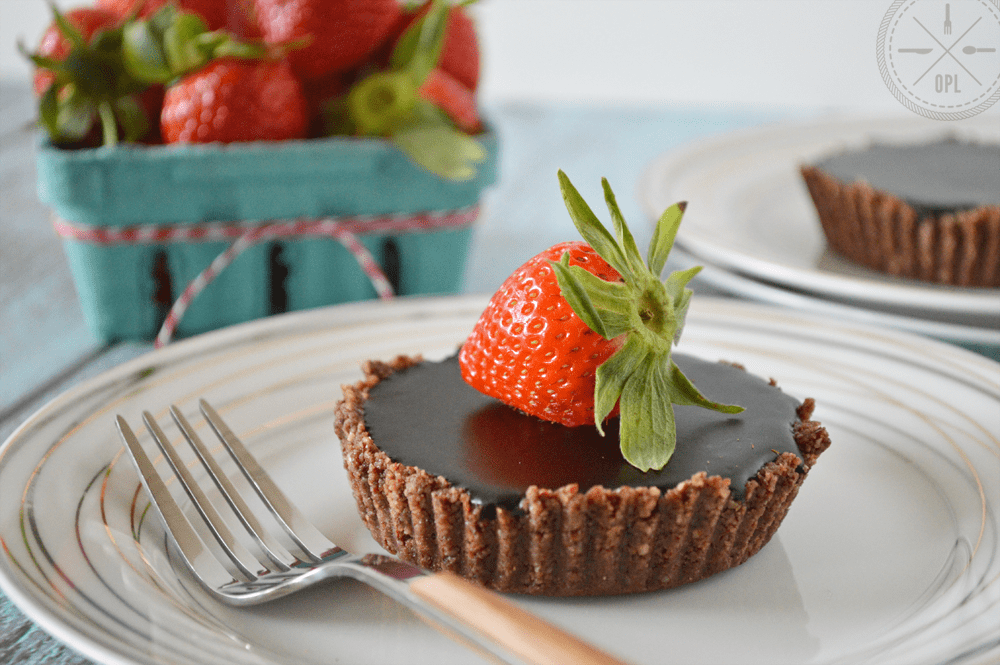
Mini Chocolate Hazelnut Tart {paleo, vegan, raw} | Our Paleo Life

Life has been busy and I’ve taken a little hiatus from recipe making. We’ve been eating out a little too often and when I do cook dinner, I’ve been making some of our go-to favorites, like the Caveboy Casserole, Paleo Minestrone Soup, and Slow Roasted Pork Shoulder. They’re all super easy, everyone likes them, and we always have enough for leftovers so it’s less cooking for me.

But I’m trying to break away from the lull of easy dinners and make some new recipes for you guys. I have a really delicious chicken recipe that I’m perfecting, but until then, let’s talk dessert.

Mini Chocolate Hazelnut Tart {paleo, vegan, raw} | Our Paleo Life

As I have mentioned here in the recent past, I’ve started this love affair with chocolate. It’s not so good, so I’m trying to back off a bit, but oh my gosh, these little tarts are amazing! They are rich, dense, and oh so chocolatey. I sound like a cartoon bird describing a breakfast cereal. Since these tarts are mini, and not a full-size tart, I don’t feel so terrible about eating a whole tart on my own.

Mini Chocolate Hazelnut Tart {paleo, vegan, raw} | Our Paleo Life

While you could easily just use mini tart pans, not everyone has those, so I came up with an alternate to the tart pan. The important part is that you must use foil or foil-lined muffin cups. Just take one, then use the top (with no lid) of an 8oz canning jar and press down in the center of the muffin cup until you hit the counter. This will widen the opening of the muffin cup, leaving you with a cute little homemade tart liner.

Turn a Muffin Liner Into a Tart Liner | Our Paleo Life

A couple notes about this recipe and some possible modifications and customizations:

  • You could certainly user Natural Cocoa Powder for the entire recipe, but I love using a combination of Natural and Dutch-Process (or Black Onyx) Cocoa Powder. It adds a whole new level of richness when you use some darker cocoa. If you use just Natural Cocoa Powder, your tarts will not be as dark as the ones in these photos.
  • This recipe calls for vanilla extract in the filling, but I would highly suggest you play around with this and switch out orange, coconut, or mint extract as well. There are plenty of flavors that work perfectly with chocolate, so play around with what you love and find what works for you.
  • You could leave the crust cocoa-less, just make sure to add 2 tsp more flour if you choose to leave out the cocoa.


So go make these ASAP. They come together super fast and if you don’t heat the filling mixture too hot, then you can get away with only chilling them for about an hour and get to eating them faster. More eat time, less wait time. That’s a good thing.

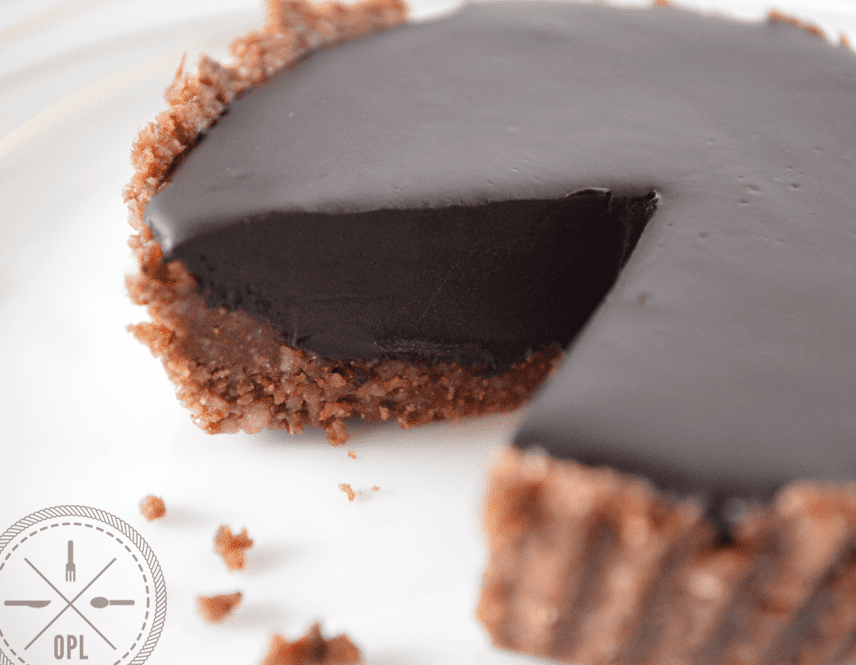
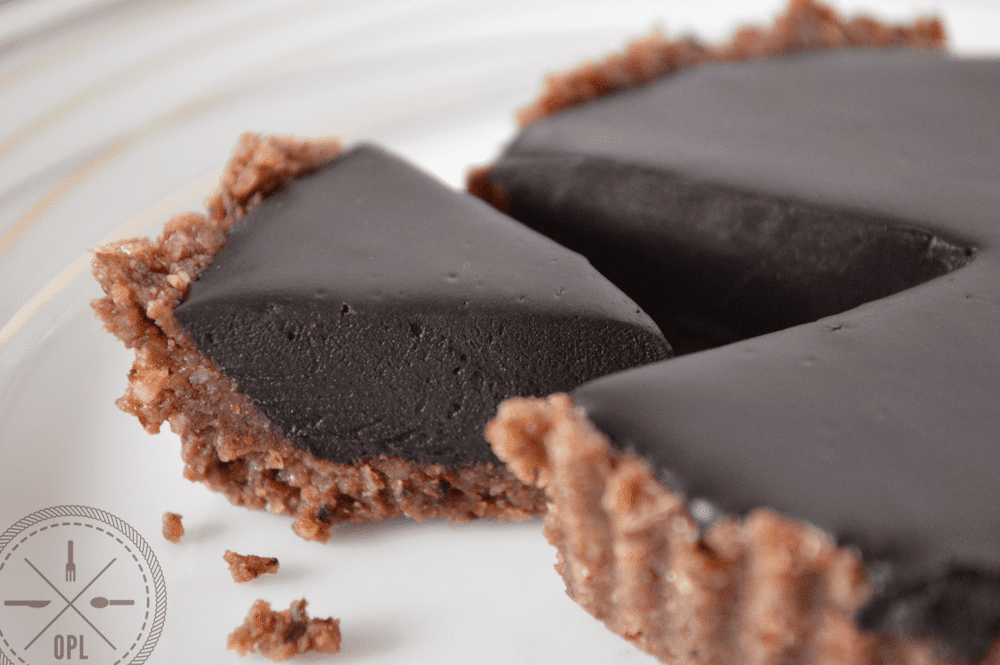
Mini Chocolate Hazelnut Tart {paleo, vegan, raw} | Our Paleo Life

PS: You know that everything made in a mini version is way cuter. It’s hard to tell from the picture above since there is nothing to offer perspective, but that little slice of heaven is only about 1″ from end to end. The absolute most adorable little tart slice you’ll ever eat.

View Full Recipe

Click the button to see the exact, printable recipe with ingredient list, instructions and timer.

Recipe: Chocolate Hazelnut Tart {paleo, vegan, raw}

Food and Tools Used In This Recipe

Click the images below to purchase any of these items.

*Affiliate links are included in this post. I receive a small commission from any purchase made by clicking these links. The commissions paid help to cover the costs associated with maintaining this website. Thank you!*

The post Chocolate Hazelnut Tart {paleo, vegan, raw} appeared first on Our Paleo Life.

Cool As A Cucumber Salad

$
0
0

Cool As A Cucumber Salad | Our Paleo Life

I wish I had a garden. We are currently renting, so I’m not wanting to put in the effort needed to mess with the backyard and try to put in a temporary garden. I tried that last year and after a hailstorm that took out half of my tiny little plants, I just gave up and let it all go to waste. So here I am, gardenless.

But if I had a garden, I would grow tons of tomatoes, cucumbers (especially the little pickling cucumbers), herbs, garlic, onions, strawberries, raspberries, blackberries, any berry, salad greens, chives, oh the list goes on. We had a peach tree once, and that was amazing. We have an apple tree but it never flowers. There’s a cherry tree down the street in someone’s front yard and the only thing stopping me from picking every single one is my conscience. Because if my stomach had any say, I’d have buckets of cherries right now.

Luckily, we live near great farmer’s markets, and I have access to all this from local farmers at a decent price. Soon, I’ll be making my own pickles, one of my most favorite things to do. There is nothing like a homemade dill pickle.

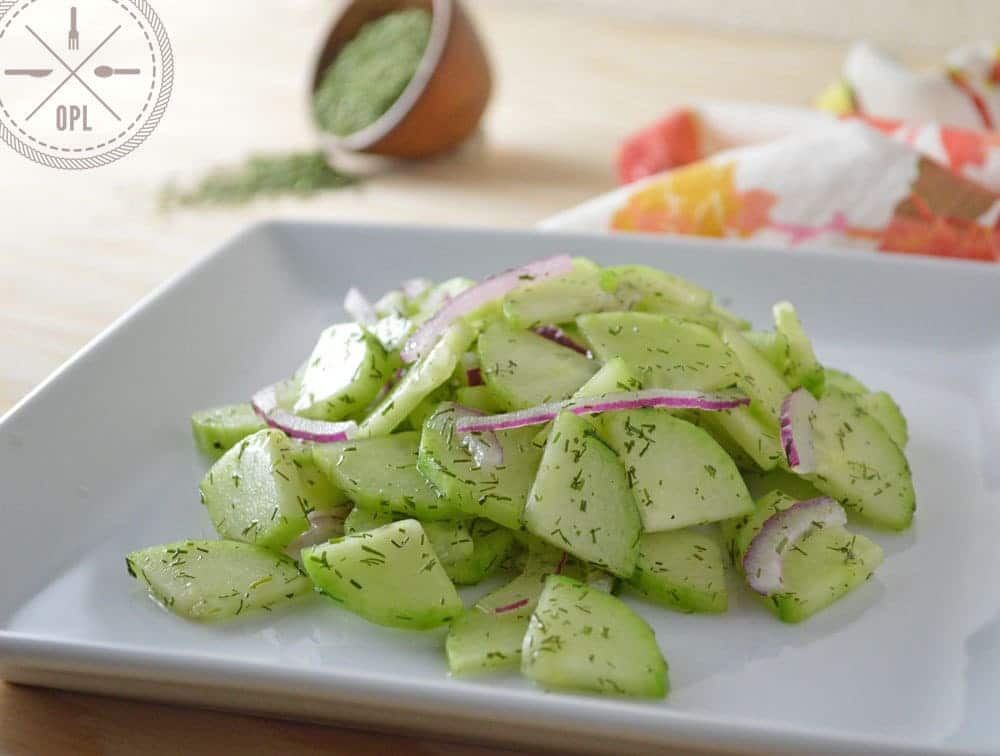
Cool As A Cucumber Salad

Another favorite is a cool cucumber salad. Oh hey, look, I just happen to have a recipe here for a cucumber salad. What a coincidence. You know what I didn’t mention above that I’d grow in my garden? Dill. I forgot about dill. You need to dill to make pickles and cucumber salad. Since I don’t have fresh dill, I buy the freeze-dried stuff in the produce department. I also use it to make Paleo Ranch Dressing, so I always have a couple bottles of it on hand. It’s good stuff.

View Full Recipe

Click the button to see the exact, printable recipe with ingredient list, instructions and timer.

Recipe: Cool As A Cucumber Salad

The post Cool As A Cucumber Salad appeared first on Our Paleo Life.

Paleo Granola Crunch

$
0
0

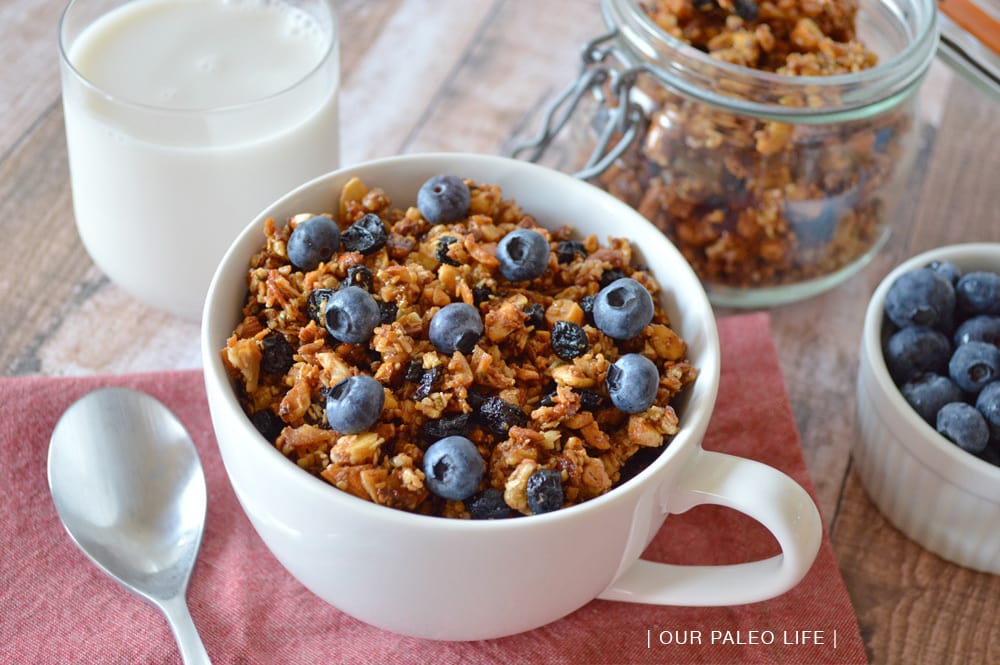
Nutty Granola | Our Paleo Life

You know what just hit us? The heat. The oppressive 100-degree heat. It’s been raining and hailing out here in Colorado every afternoon like clockwork, but now the heat has arrived. This is going to be one of those weeks where I just sit inside, and hopefully work on more of those recipes that I have in the queue.

Paleo Granola Crunch | Our Paleo Life

I have a confession to make: I created this recipe nearly a year ago (11 months to be exact) and never shared it. I feel pretty bad about that because it’s really the best grain-free granola I’ve ever had. I made it, took some pictures, and stored it in my drafts, thinking I’d get around to posting it a few days later. Well, a few days turned into a few months that turned into a year. My bad.

But it’s okay, because I do already have another granola recipe on the blog, but this one is pretty different. It’s more like a typical granola, very crunchy. There’s nothing to get soggy, so that’s really the best part. The crunch is fantastic, but you do have to watch it like a hawk towards the end of the baking time to be sure you’re not burning it.

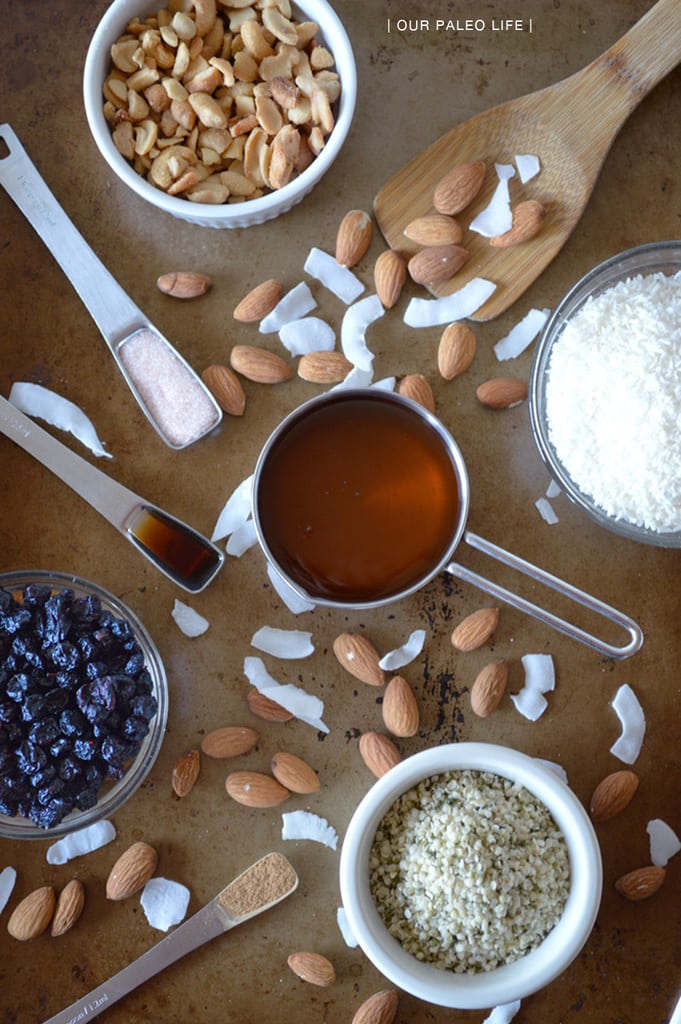
Paleo Granola Crunch | Our Paleo Life

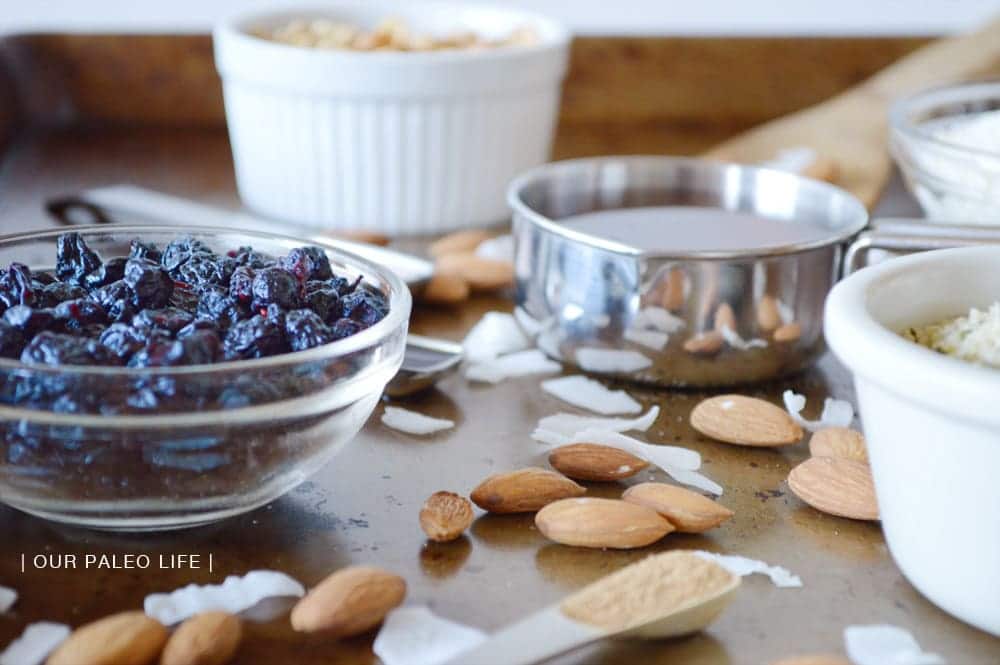
While you can douse this granola in either coconut milk or almond milk, chocolate almond milk is actually our family’s preference. Also, a little note about dried fruit in this recipe: I’ve made it with both dried cranberries and dried blueberries. I most commonly make it with blueberries but my husband actually prefers it with no dried fruit baked into it at all and adds fresh berries to the bowl of finished granola.

So do what you like best, it’s great no matter how you do it.

Paleo Granola Crunch | Our Paleo Life

Fast and Easy Paleo Recipes

View Full Recipe

Click the button to see the exact, printable recipe with ingredient list, instructions and timer.

Recipe: Paleo Granola Crunch

Food and Tools Used In This Recipe

Click the images below to purchase any of these items.

*Affiliate links are included in this post. I receive a small commission from any purchase made by clicking these links. The commissions paid help to cover the costs associated with maintaining this website. Thank you!*

The post Paleo Granola Crunch appeared first on Our Paleo Life.

MangoBerry Popsicles

$
0
0

MangoBerry Popsicle | Our Paleo Life

My kids often remind me when I’m slacking on anything that affects them. Like the 3,000 times a day that they are literally starving and may wilt away to nothing. Or the time I promised them I would maybe possibly think about taking them to the toy store. Or that time they asked for a popsicle that I never made. Yeah, that last one is catching up to me big time.

Last summer I was on the ball, making popsicles out of leftover smoothies nearly every day. Now that I’m not as big into smoothies, I often forget to make popsicles for the kids. Until they nag me for hours about it, of course.

MangoBerry Popsicle | Our Paleo Life

The other day, we were in Whole Foods and there was an endcap display of Tovolo popsicle molds. I’ve been wanting to upgrade for a while, since all we have are some small Ikea molds. I decided “Well, Whole Foods is the place you drop your paycheck, might as well get them while I’m here” and into the cart they went. When we got home and opened the box, I was shocked at how big they were. I mean, they’re not huge or anything, but compared to the midget-sized Ikea molds, these were a big change. And the kids flipped, they were so excited, because it’s probably 3 of the Ikea popsicles in one.

MangoBerry Popsicle | Our Paleo Life

Now that I had new molds to break in, I had to decide what to make. I didn’t want to do a normal smoothie popsicle, I wanted it to be fancy. I had gotten a bunch of mangoes on sale the week before, even though I don’t really like them, and decided those were getting mashed up for the kids. But they needed some excitement. Raspberries won that contest, you just can’t beat the orange and magenta together like that. I had visions of popsicles running through my head, pretty orange visions.

MangoBerry Popsicle | Our Paleo Life

And the real things did not disappoint. I just love the way these turned out. Even if they tasted gross, they’d still be beautiful, but luckily, they tasted great too, even if I’m not a mango person. I could be for these. They are creamy, because of the coconut milk, with a little bit of crunch from the berries. I prefer to use frozen instead of fresh raspberries because they won’t turn the entire popsicle mixture a pink color when mixed in, and will stay suspended as little rosy flecks.

And now that my kids have a taste for blood (er, I mean popsicles) this summer, I’m sure I’ll come up with plenty more colorful concoctions. It’s actually pretty fun. Maybe I’ll try some layers. Popsicles have layers. Ogres have layers.

I watch too many kid movies…

MangoBerry Popsicle | Our Paleo Life

View Full Recipe

Click the button to see the exact, printable recipe with ingredient list, instructions and timer.

Recipe: MangoBerry Popsicles

Food and Tools Used In This Recipe

Click the images below to purchase any of these items.

*Affiliate links are included in this post. I receive a small commission from any purchase made by clicking these links. The commissions paid help to cover the costs associated with maintaining this website. Thank you!*

The post MangoBerry Popsicles appeared first on Our Paleo Life.

White Chocolate Almond Butter

$
0
0

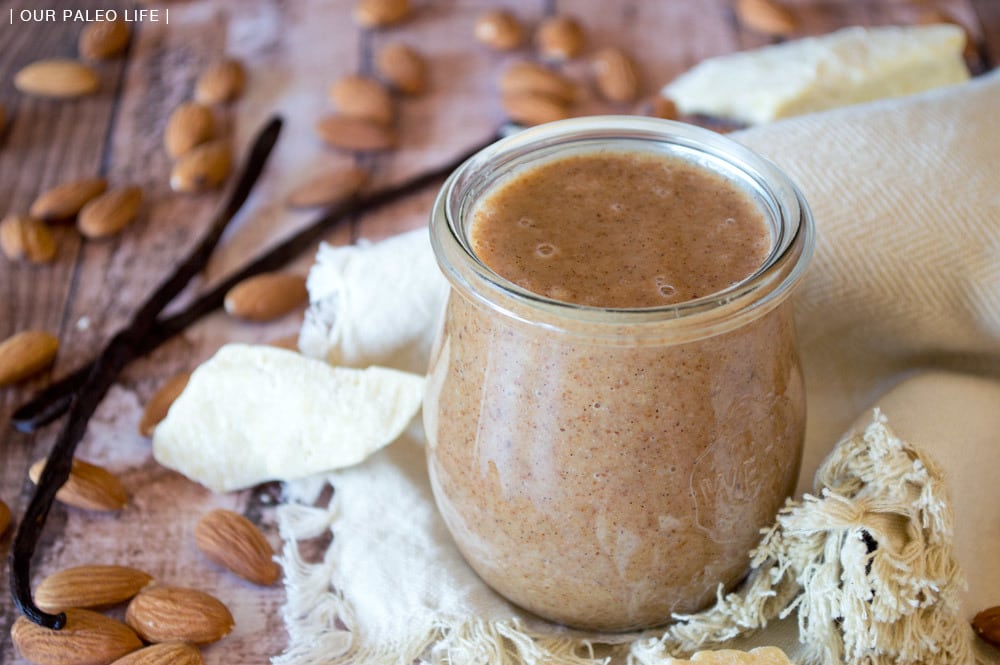
White Chocolate Almond Butter | Our Paleo Life

Sometimes, a thought pops into my head and I must make it happen immediately. However, if I don’t have the ingredients to make that certain inspired recipe come to life, it puts me in a funk. Naturally, the only solution is to send the husband to the store to find those ingredients for me.

Case in point, cocoa butter. I’ve never purchased cocoa butter, I didn’t even know if I could buy it locally or not or if I had to buy it on Amazon or something. But regardless of what I knew, I sent Rob to Natural Grocers to see if they carried it. Lucky for me, they do! And why did I want cocoa butter so badly? Because I have been a chocolate junkie lately and finding paleo-friendly chocolate is near impossible and I wanted to take a stab at making my own chocolate bars. However, I still haven’t perfected it, though that won’t stop me from trying. Tempering is really the problem, I don’t want a chocolate that melts the second I pick it up, you know.

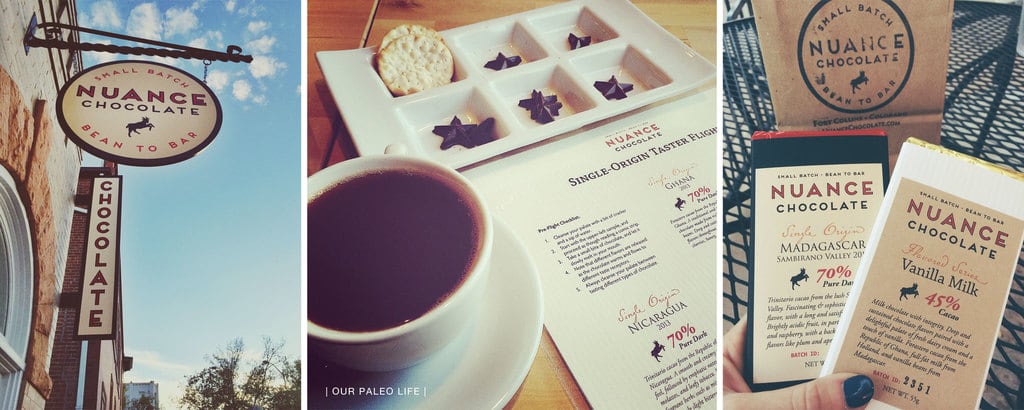
And while we’re on the topic of chocolate, I feel so fortunate to live near the most adorable little chocolate shop. Nuance Chocolate just opened up here in town a couple days ago so we went last night to check it out. I have been anticipating this opening for no less than 2 months, so it was like Christmas came a couple months early when I finally walked inside.

Nuance Chocolate, Fort Collins, CO

We ordered 2 Taster Flights, each with 5 different samples to try, a Theo Brew (brewed cocoa beans), and a French-Style Hot Chocolate. Of the 10 different chocolates we tasted, we narrowed it down to just 2 bars to take home. Narrowing it down was hard for me. There were at least 4 that I wanted right that minute, but 2 will have to do for now. The Single-Origin Madagascar bar tasted like raspberries. It was so interesting to see how different all the single-origin chocolates tasted. It never occurred to me that cocoa beans from different regions would have such vastly different flavors. My 2 favorite dark chocolates were Madagascar and Ecuador. The 45% Vanilla Milk Chocolate was some of the best milk chocolate I’ve ever had.

And sort of on the same topic of chocolate, how about we get to today’s recipe. There is cocoa butter in it, so it’s all connected, right? I’ve been meaning to post this recipe for some time, ever since I teased it on Instagram here and here. In my line of work, we have really busy times and some slow times. We’ve been in the busy times lately, and I’ve been trying to spend any free time I have with my family (camping, hiking, just anything that’s not working) which hasn’t left much time for experimenting in the kitchen. With the warm weather changing to cold, I imagine I’ll be indoors more often than not, so hopefully that translates to more fun experiments in the kitchen.

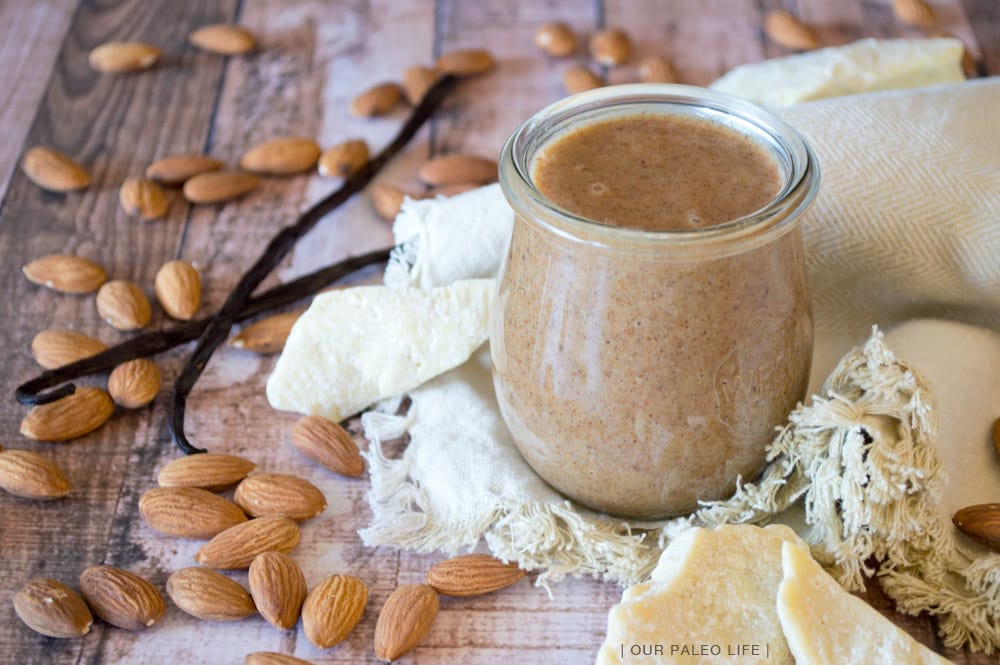
White Chocolate Almond Butter | Our Paleo Life

If you’ve never made almond butter before, it can be a finicky beast. Making pure almond butter is one thing, it’s usually fool-proof, but when you start adding things to it, especially sweeteners, weird things can possibly happen. Because the butter gets pretty warm (borderline hot) during the process, when you add the honey or maple syrup it can seize up. You have a couple options here:

  1. Let the almond butter cool down first before you add anything
  2. Add the additions and then run through the processor again until it gets smooth

I usually choose the latter because it’s less wait time. But it takes a toll on my food processor, since it’s already been running about 20 minutes.

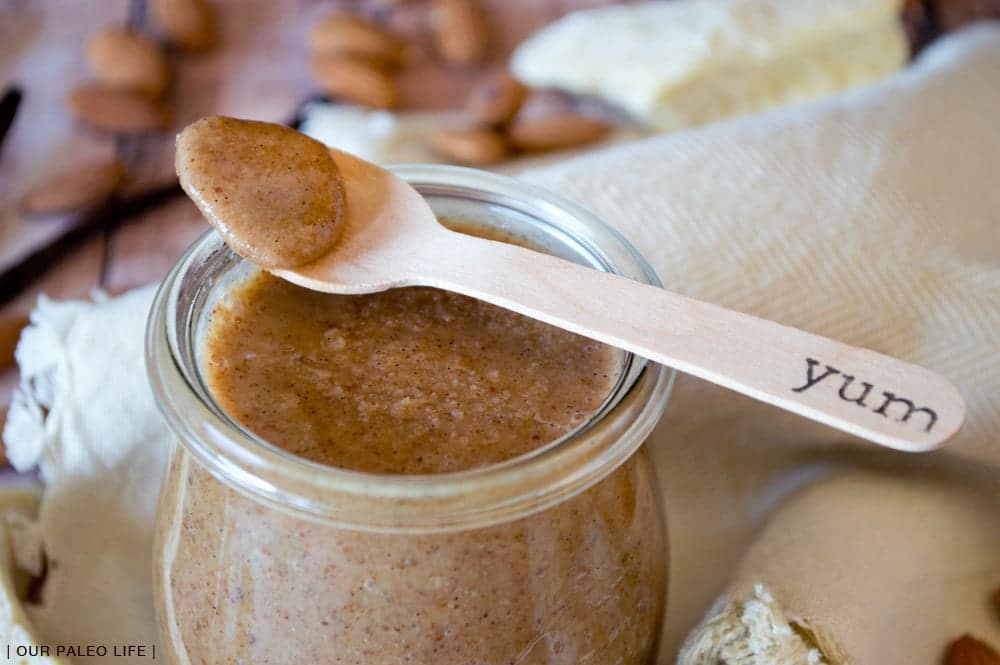
White Chocolate Almond Butter | Our Paleo Life

Now, I don’t want this to scare you off from trying this, because it truly is worth it. I actually refused to give up my precious peanut butter when we went paleo because I couldn’t stand the thought of eating almond butter. Every kind I bought from the store just tasted yuck to me. But when I made it myself, I was shocked at how good it really was. It probably didn’t hurt that I flavored it like white chocolate, though…

White Chocolate Almond Butter | Our Paleo Life

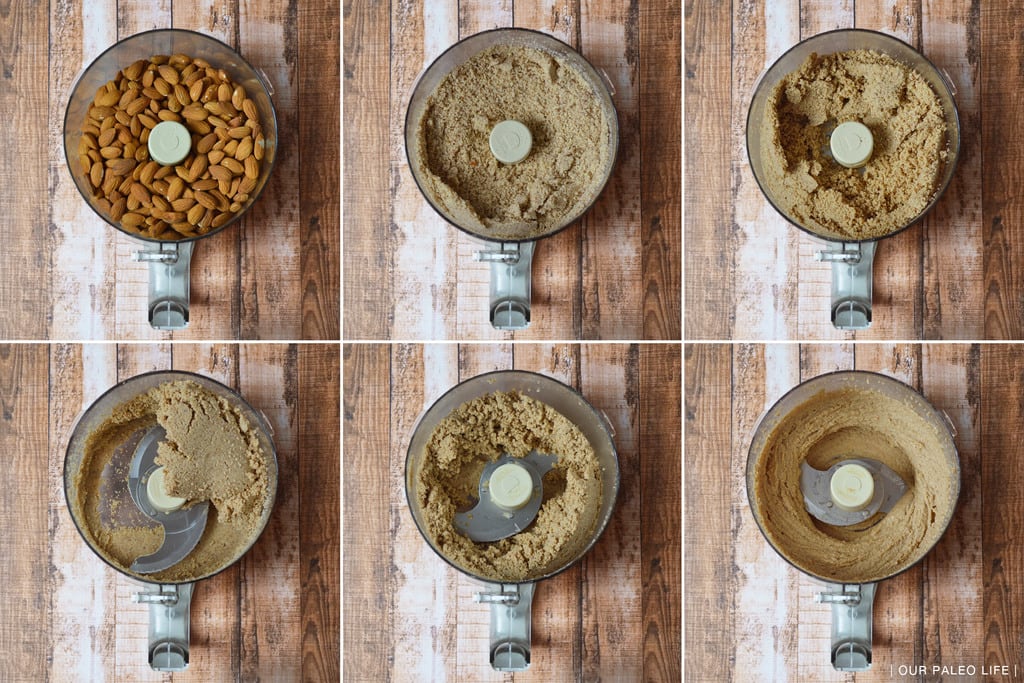
When making almond butter, it goes through a series of stages. At first, it turns into almond meal, then a weird grainy paste, then a clumpy paste, and then finally a creamy-liquidy butter. The most important step in making this White Chocolate Almond Butter is to pour it all into an adorable glass jar and NOT eat it all with a spoon when it’s fresh and warm. Your stomach will make you pay and then you won’t have any left to enjoy later. This will be the hardest part of the process, I promise.

White Chocolate Almond Butter | Our Paleo Life

Also, make sure you store this out of the reach of children. Trust me.

View Full Recipe

Click the button to see the exact, printable recipe with ingredient list, instructions and timer.

Recipe: White Chocolate Almond Butter

The post White Chocolate Almond Butter appeared first on Our Paleo Life.

Jalapeño Poppers {by The Primal Desire}

$
0
0

Jalapeno Poppers by The Primal Desire

Just in time for holiday parties, Holley from The Primal Desire is back with a dairy-free recipe that is the perfect party appetizer. Raj and Holley have a ton of easy, delicious recipes just like this one, and you can find even more in their free eBook, “Cheap Paleo Recipes“.

Jalapeno Poppers by The Primal Desire

Well, where has the time gone? We are in the heat of December (or the chill? You know what I mean…), and the holidays are fast approaching. Christmas concerts, holiday parties, cheer and merriment. And of course FOOD! Food is love and as you spend time with friends and family the urge to overindulge surrounds us. I know I have just started a string of holiday coffee dates, wine lunches, and holiday beverages.

Jalapeno Poppers by The Primal Desire

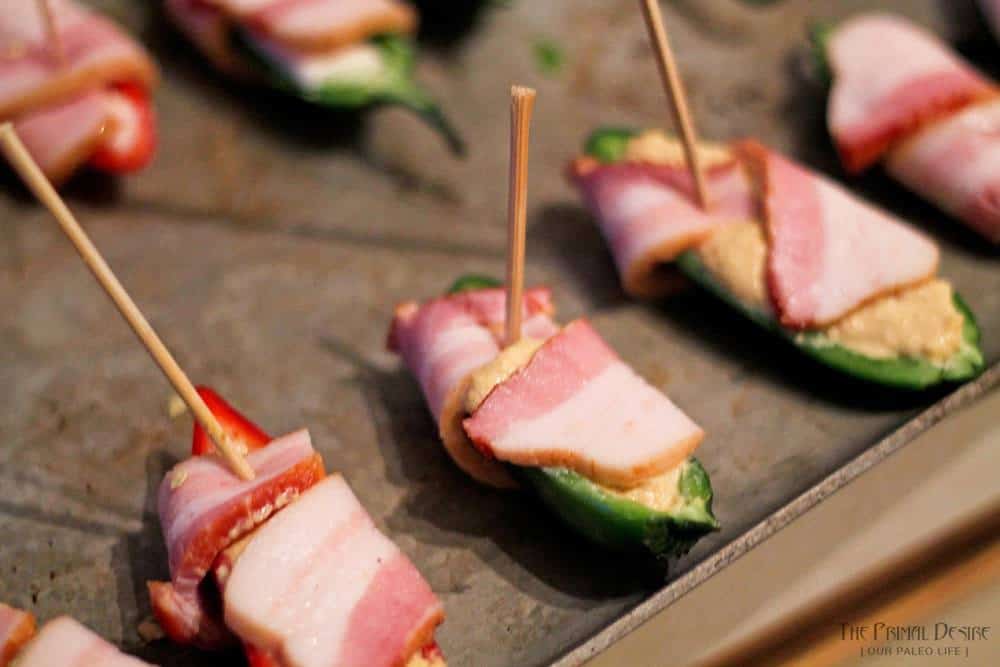
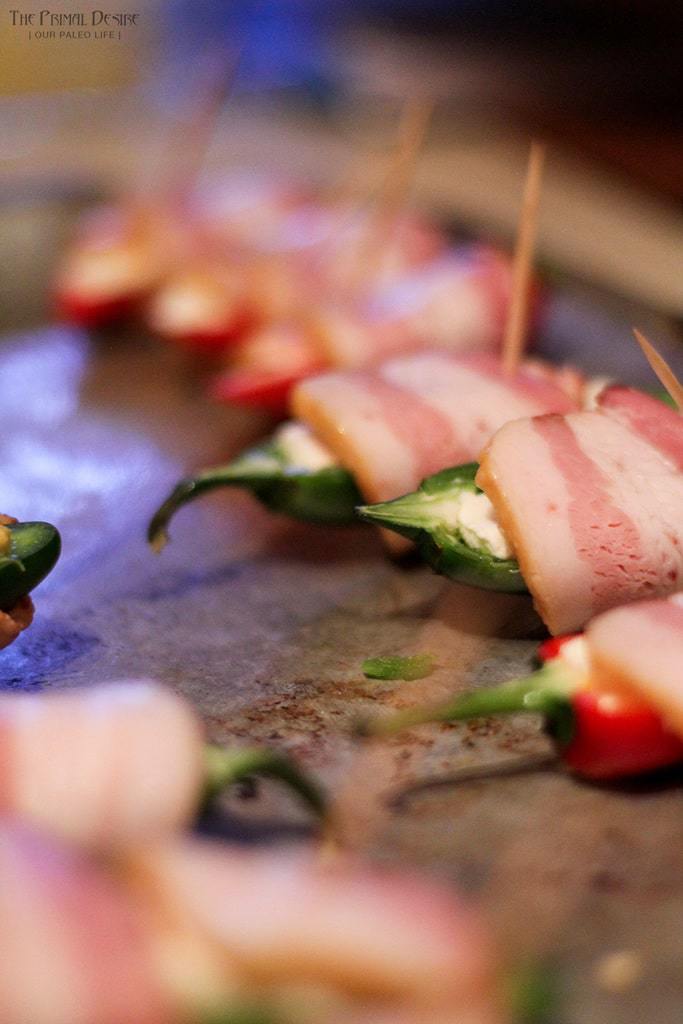
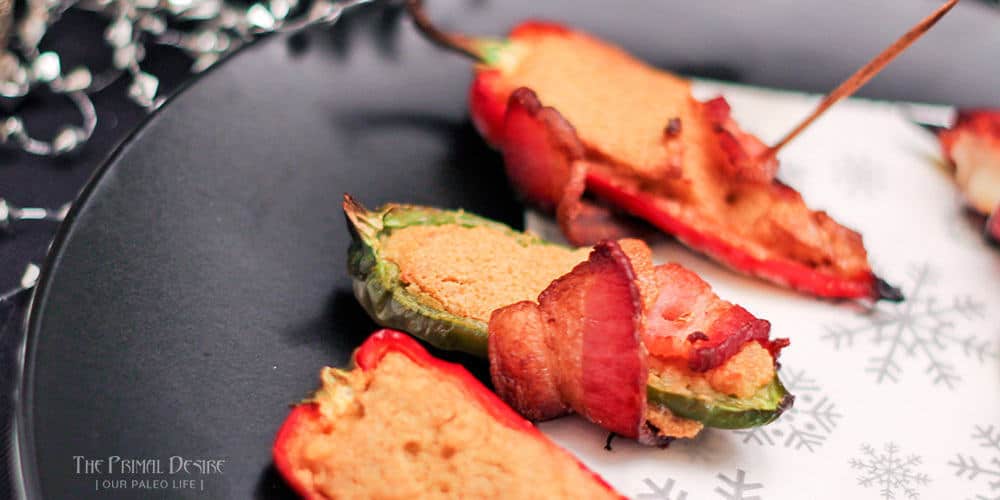
Snacking, parties, potlucks and open-houses. It can be hard to find dishes easy to take with you that are tasty and affordable to make. And healthy. And easy. These paleo jalapeno poppers can be vegan if your omit the bacon- I know I would be sad to see the bacon go, because, hello…bacon, but it is a versatile appetizer. And when you use red and green peppers they kind of look like a string of old school Christmas lights! Cool. Playing with your food is fun.

Jalapeno Poppers by The Primal Desire

Have you finished your Christmas shopping? I haven’t started mine. But I did get organized enough to send cards. Funny story: I bought my Christmas cards last year. Not in January when they go on sale, I bought these in November, and had every intention of sending them last year. I failed. I am in the liquor business so the month of December is hectic: stocking and selling cheer. And well, I forgot about them, they ended up in a pile. It must have been meant to be, I discovered them stacked neatly in said pile at the beginning of this month. So a year late, but none the wiser, I sent out my last years cards. Except I just gave away my secret. Shoot. I only had to find a couple envelopes to change addresses, my friends don’t move much. Last year I didn’t get around to personalized messages inside (thankfully) so I took care of that this year. Look at me ahead of schedule! They are even stamped and mailed. I am entirely impressed with myself, but when I really think of it, I am a full year behind. I wonder if I should purchase next years cards now and put them in a pile? Feels like it might be too organized!

Jalapeno Poppers by The Primal Desire

Now about that Christmas shopping… I have lots of time… right?

Have a safe and happy Holiday season from Raj and Holley at www.ThePrimalDesire.com!

Jalapeno Poppers by The Primal Desire

View Full Recipe

Click the button to see the exact, printable recipe with ingredient list, instructions and timer.

Recipe: Jalapeño Poppers {by The Primal Desire}

The post Jalapeño Poppers {by The Primal Desire} appeared first on Our Paleo Life.

Paleo Balsamic Ketchup

$
0
0

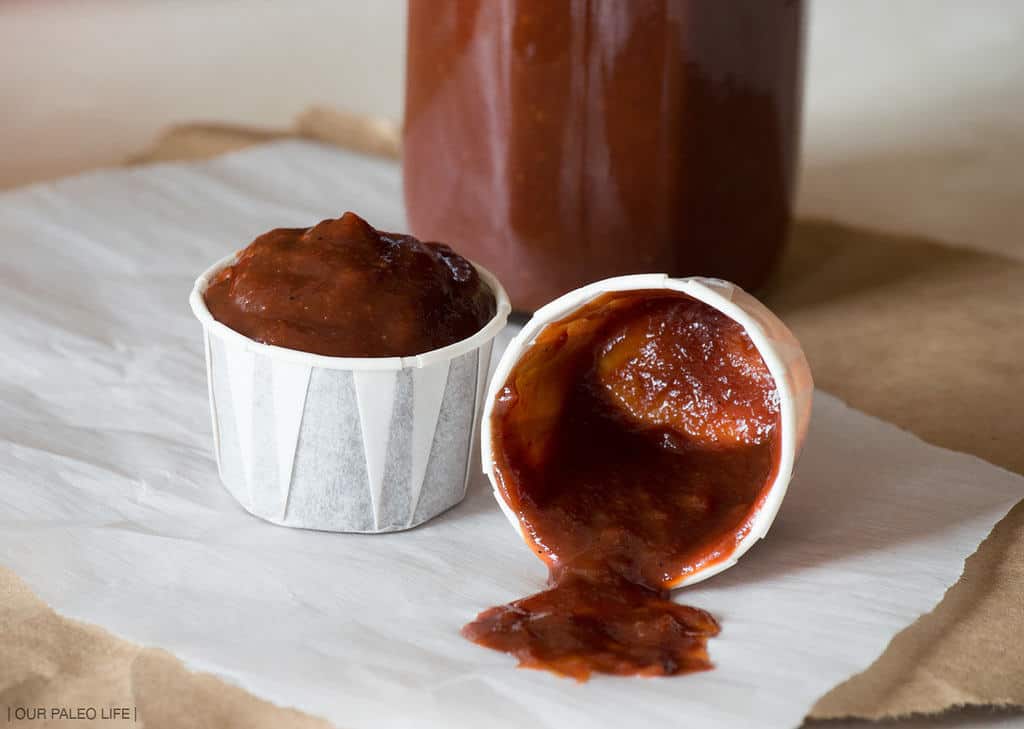
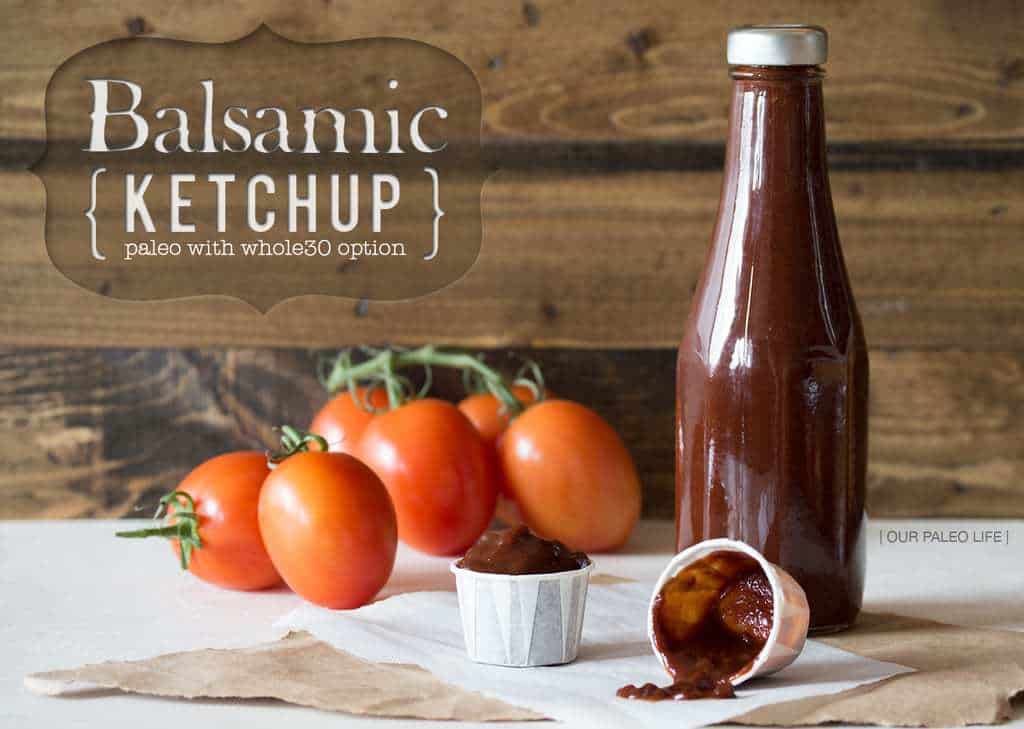
Paleo Balsamic Ketchup {by Our Paleo Life}

One day, many months ago, as our family was shopping for an upcoming camping trip, we stumbled across a bottle of Heinz ketchup. But this was no ordinary ketchup, it was balsamic vinegar ketchup. Now, full-disclosure here, we totally bought it because balsamic vinegar. Also, it was all in the name of science, er, recipe testing. I had to know what it tasted like because clearly, continuing to purchase Heinz was out of the question, so a copycat paleo version was basically a requirement.

I though about making this recipe for a long time but never got around to it. When I finally did, I went through about 3-4 different variations before I got to the one that was just right. Yeah, we went through a lot of ketchup. Good thing my family is a good sport even with the recipe “failures”.

Paleo Balsamic Ketchup {by Our Paleo Life}

I’ve actually been hanging on to the “success” recipe for some time now, again, just never got around to actually posting it. But now that I’m on day 4 of my Whole30, and working on my meal plan, I realized I needed sugar-less ketchup in my life and so do you.

Paleo Balsamic Ketchup {by Our Paleo Life}

While this recipe uses honey, you can totally leave it out for Whole30-compliance. The tomatoes are sweet enough and if the ketchup is stored in the fridge for long enough, all the flavors meld really well and the sweetness in the tomatoes really comes through. So go honey-less with your ketchup, enjoy that perfect balsamic flavor, and revel in the fact that you’ll never have to buy ketchup again.

PS: I lurve mixing this ketchup with Paleo Lime Mayo for an awesome burger/fry sauce. Try it!

View Full Recipe

Click the button to see the exact, printable recipe with ingredient list, instructions and timer.

Recipe: Paleo Balsamic Ketchup

The post Paleo Balsamic Ketchup appeared first on Our Paleo Life.


Slowcooker Sweet Potatoes

$
0
0

Slowcooker Sweet Potatoes {by Our Paleo Life}

Oh man, this past week has made me extremely aware (more than usual, somehow) that food prep is so incredibly important on a Whole30. I mean, I always knew this, I practice it often, but something about this past week has just hammered it home.

Now that the holidays are over, traveling has come to an end, and things are evening out at work, I’m trying to get back into the routine of getting to the gym on a more regular basis. What this means is that I now remember the importance of having something to eat as soon as I get home. Surprisingly, protein is easier for me to whip up and carbs usually take much longer, but I need to get those carbs in quickly.

Slowcooker Sweet Potatoes {by Our Paleo Life}

Enter the crock pot. I’m telling you, this thing is fantastic. I try to remember to use it often, because it really is great at saving my butt on crazy days. But it’s also so great for food prep. And now, I’m able to make a week’s worth of sweet potatoes while I sleep! Not even joking.

Slowcooker Sweet Potatoes {by Our Paleo Life}

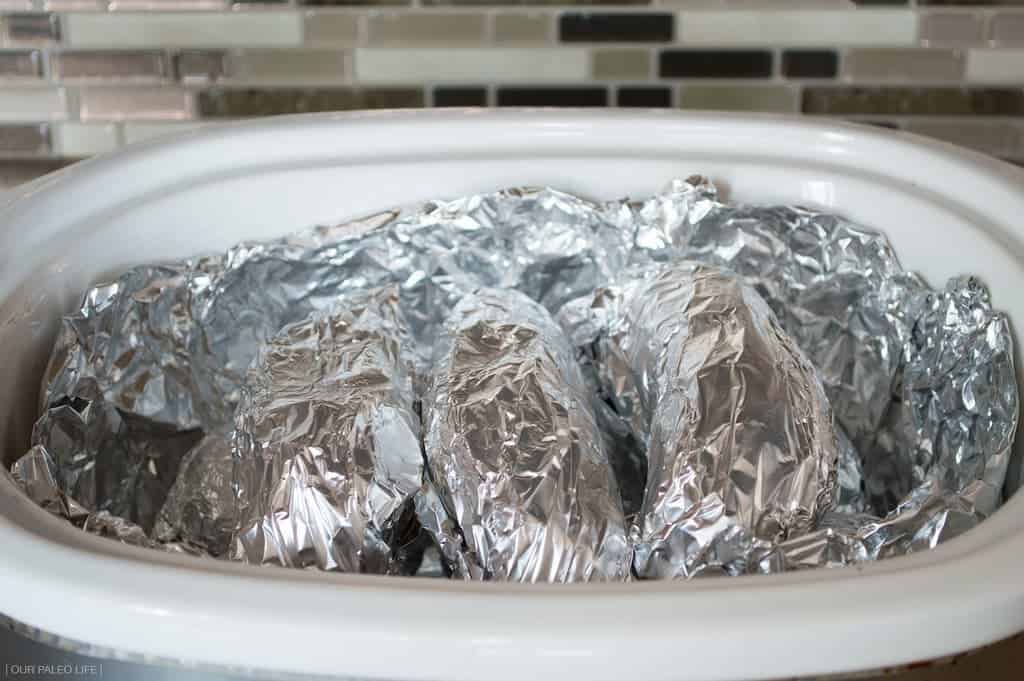
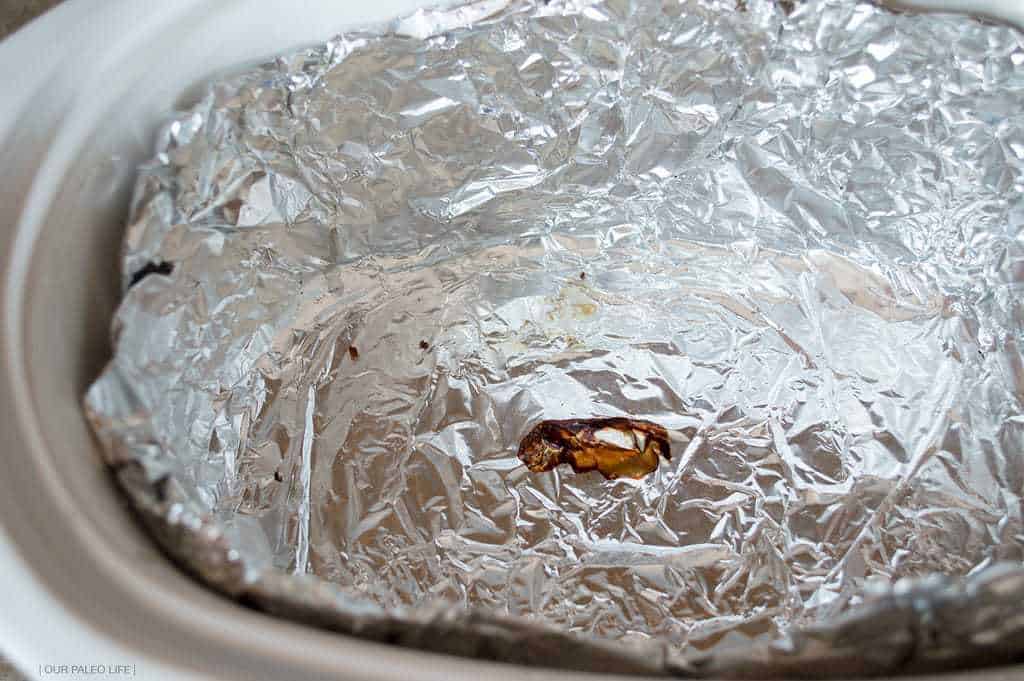
I’m not even sure this qualifies as a recipe, more of a detailed tip, but I’ve written it out anyway. And you’ll see that the first step is to line your slowcooker with foil (see the pic below). While this is optional (it won’t affect how your potatoes turn out) you really shouldn’t skip it. I skipped it once, never again. No matter how tightly you wrap those potatoes in foil, you are going to experience some “seepage”. Juices will leak out and burn to the bottom of the crock. If you’re a fan of scrubbing burnt on food, then skip the foil, otherwise, just do it.

Slowcooker Sweet Potatoes {by Our Paleo Life}

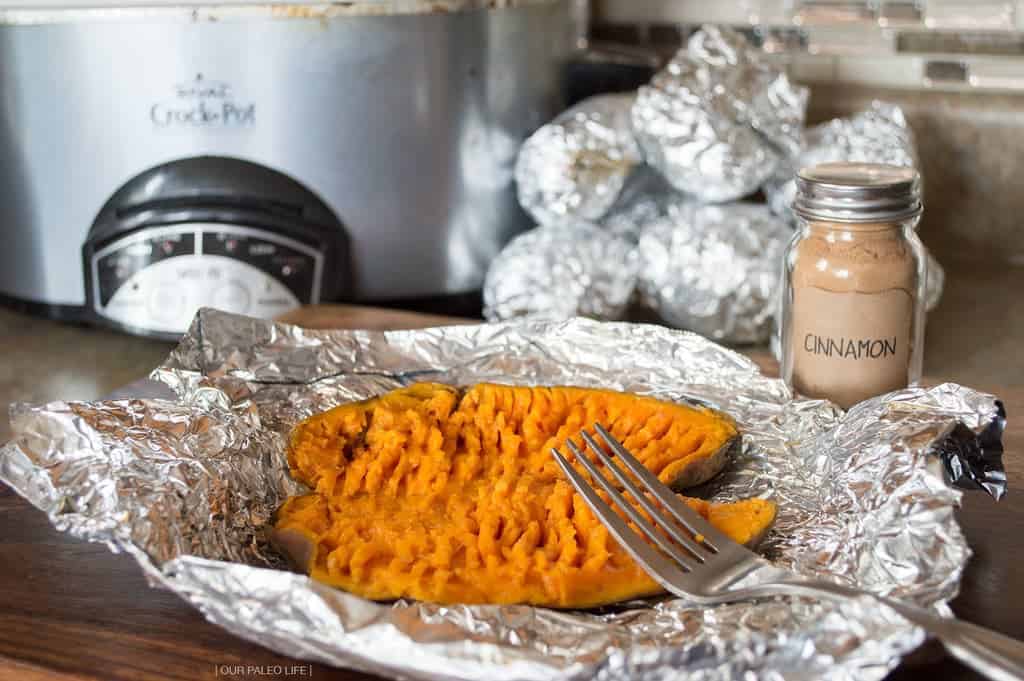
And when I said I cook these in my sleep, I’m totally serious. I set the crock pot for 8 hours and go to bed. When I wake up, the crock pot is on WARM (I love that it does that when it’s done cooking) and I’ve got a bunch of “baked” potatoes, ready to eat.

Slowcooker Sweet Potatoes {by Our Paleo Life}

Another helpful little tidbit: this makes school lunches much easier to prepare as well. I just scoop out half a potato, mash it and mix in a little cinnamon, and plop it into one of the lunch container compartments. The kids love when they get sweet potatoes, like it’s dessert, and having a bunch in the fridge makes it possible.

View Full Recipe

Click the button to see the exact, printable recipe with ingredient list, instructions and timer.

Recipe: Slowcooker Sweet Potatoes

The post Slowcooker Sweet Potatoes appeared first on Our Paleo Life.

Instant Strawberry “Yogurt” {dairy-free}

$
0
0

Instant Strawberry Yogurt {dairy-free, paleo}

I’ll be honest with you, I’m not perfect, I’m sometimes not even an 80/20 paleo person. I will cave and eat some totally paleo-illegal foods. I don’t have allergies or severe effects from most foods, this is a choice that my family has made without being forced into due to medical reasons.

That said, dairy is my kryptonite. I love me some good cheese, ice cream, and sour cream, but does that mean I should eat it? Nope. Do I eat it on occasion? Yup. Do I regret it? Always. It is not fun stuff, so when I do splurge, I try to do so in small quantities which isn’t so terrible for me.

Instant Strawberry Yogurt {dairy-free, paleo}

But every now and then, I crave some food from my past (read: pre-paleo days) that I no longer can eat. Yogurt is one of those things. I can (and do) make dairy-free ice cream at home, I can make ghee and still enjoy that buttery flavor, but yogurt is another story. I don’t want to spend a small fortune on probiotics and have to wait 2 days to make the darn stuff myself. I also don’t want to eat the dairy-free stuff from the store because they have all sorts of unnecessary ingredients like preservatice, gums, and carrageenan. Gross.

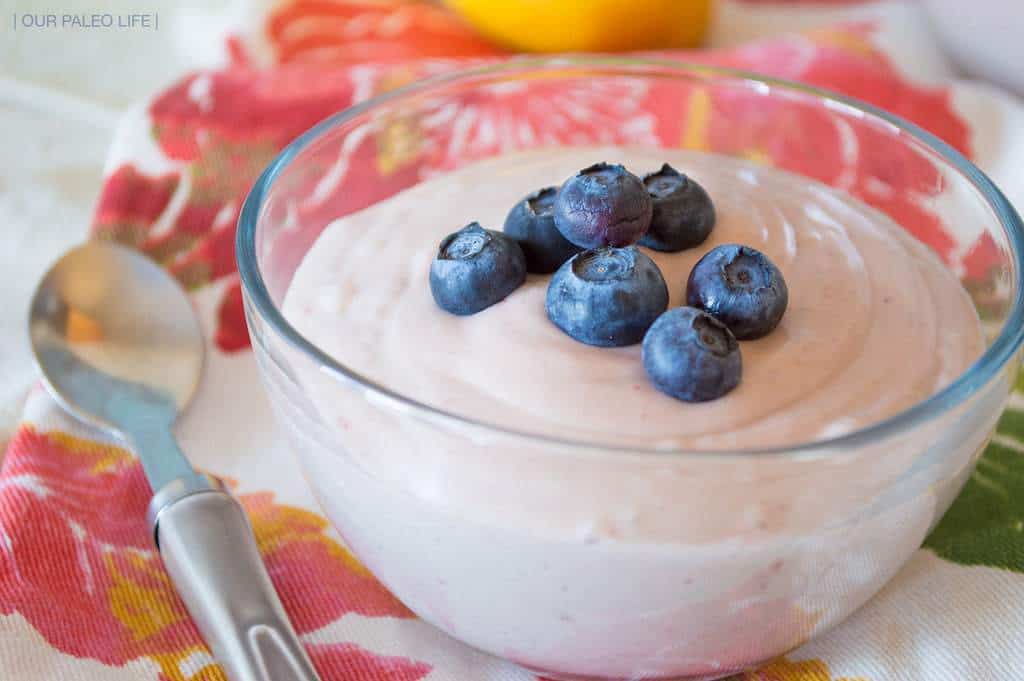
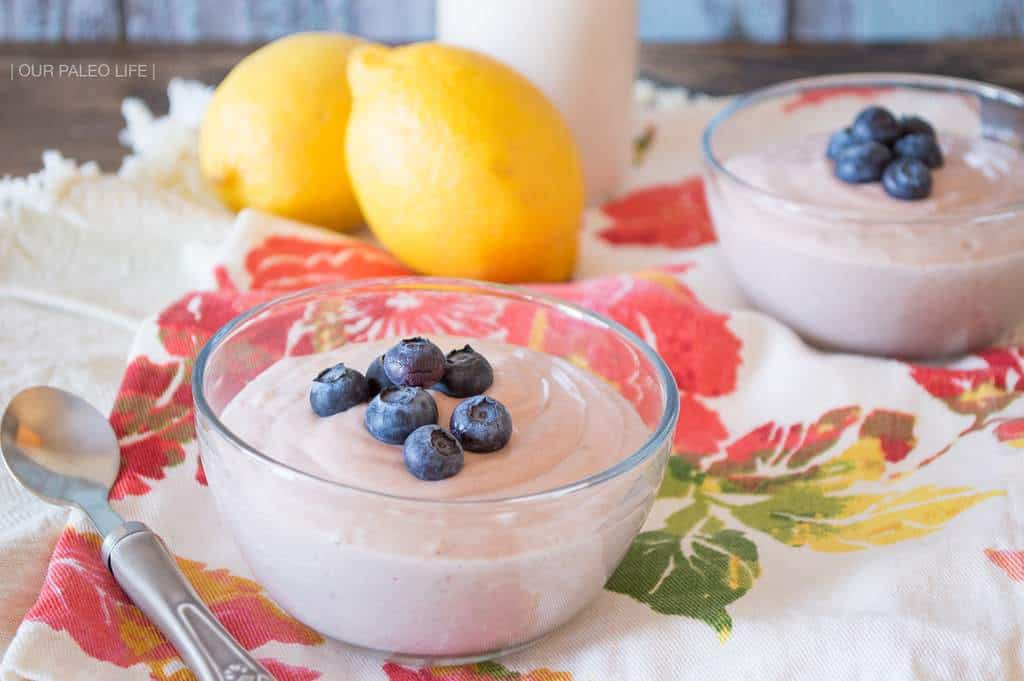
So one day, after a particularly grueling workout (Filthy Fifty anybody?), I was craving a strawberry milkshake (didn’t help that we drive right by McD’s on the way home from the gym). So naturally, I attempted to make one on the fly when we got home. Turns out, my on-the-fly version of a milkshake was awfully close to yogurt instead. With a few tweaks, I had myself a pretty good instant whipped yogurt. Color me thrilled!

Instant Strawberry Yogurt {dairy-free, paleo}

You could even change it up with different frozen fruits and make any flavor of yogurt you want. I keep meaning to do that, but strawberries are pretty much the standard in my freezer right now, but when I branch out, I’m making more yogurt flavors, for sure.

View Full Recipe

Click the button to see the exact, printable recipe with ingredient list, instructions and timer.

Recipe: Instant Strawberry Yogurt

The post Instant Strawberry “Yogurt” {dairy-free} appeared first on Our Paleo Life.

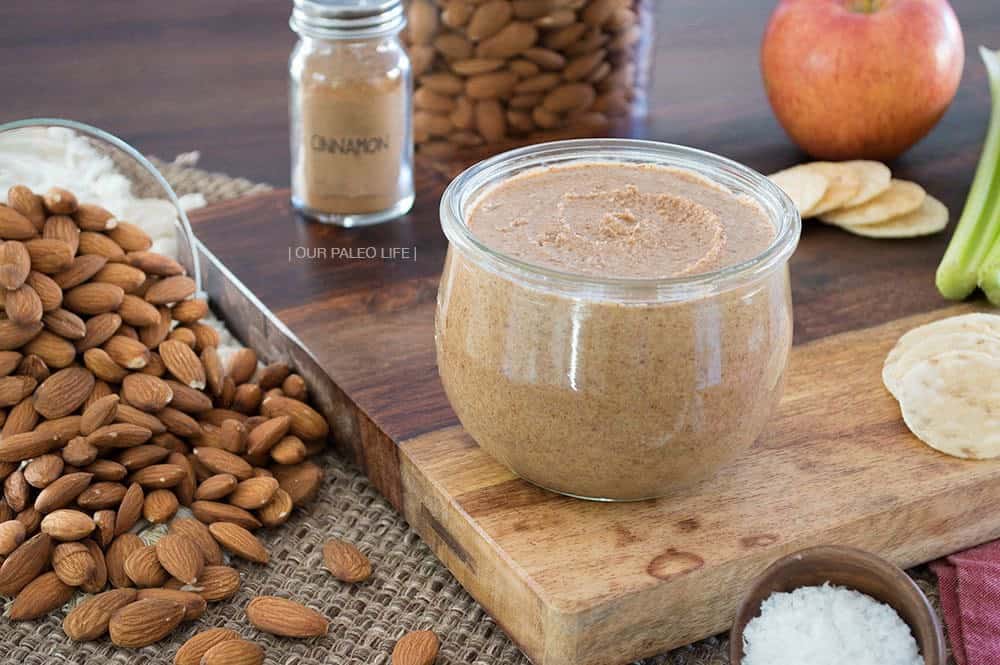
Maple Cinnamon Almond Butter

$
0
0

Maple Cinnamon Almond Butter by Our Paleo Life

Do you have a favorite of a certain type of food and never veer from that? Like you always get the same burger from the local burger joint, never venturing into the other combinations they offer? You know it’s what you like, so why bother tempting fate and wasting your precious burger time on a sub-par burger. Yeah, I’m like that. I always order the same burrito bowl from Chipotle, the same 60/40 bacon burger from our local shop, and whenever I make almond butter, I always make my White Chocolate Almond Butter.

Maple Cinnamon Almond Butter by Our Paleo Life

But last week, when I went to go whip up a batch, my heart sunk when I realized I was out of cocoa butter, which is only the most important ingredient (well, except for almonds). How could I have my white chocolate goodness without the key ingredient?! My only option (since I was not going to the store because I have turned into a homebody since moving to the mountains) was to come up with something new.

Maple Cinnamon Almond Butter by Our Paleo Life

With the holidays just around the corner, cinnamon has been my spice of choice, with pumpkin spice in a close second. Next time, pumpkin spice, next time.

Maple Cinnamon Almond Butter by Our Paleo Life

Every time I make almond butter, I use either maple syrup or honey, because what else would I use. But over the past few months, I’ve been getting a lot of my pantry staples from Thrive Market and have started adding maple sugar to my boxes. I could never get it in the grocery store, so now that I have a deliver-it-right-to-my-door option, I keep it stocked and always on hand.

Maple Cinnamon Almond Butter by Our Paleo Life

Knowing how almond butter gets warm (borderline hot) during the butter-making process, and how adding a liquid sweetener tends to make it sieze up, adding more processing time to get it back to a creamy consistency, I opted to add maple sugar instead. Oh man, that was such a good choice. No seizing, just perfect creamy almond butter with no extra processing.

Maple Cinnamon Almond Butter by Our Paleo Life

I went with only 2 tablespoons of maple sugar to let the cinnamon really shine through in this recipe, but you could definitely add more if you wanted it a bit sweeter.

Maple Cinnamon Almond Butter by Our Paleo Life

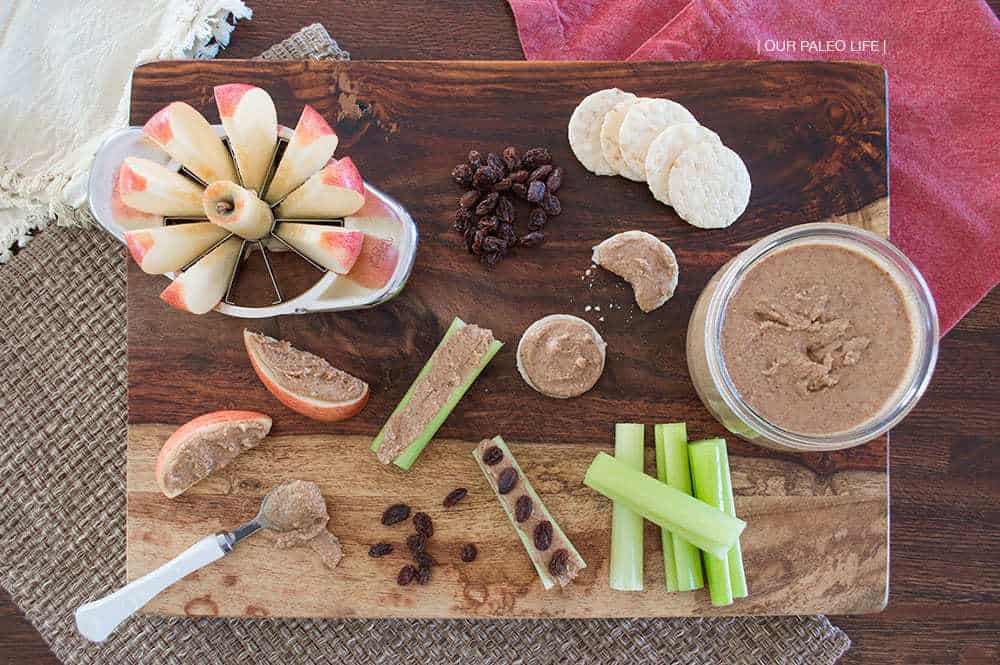
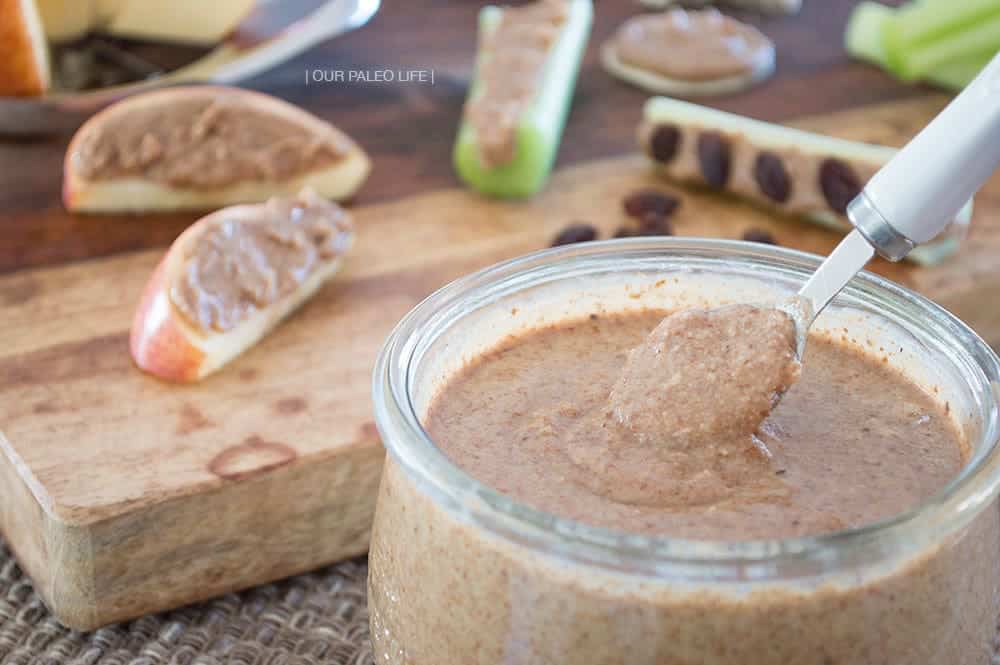
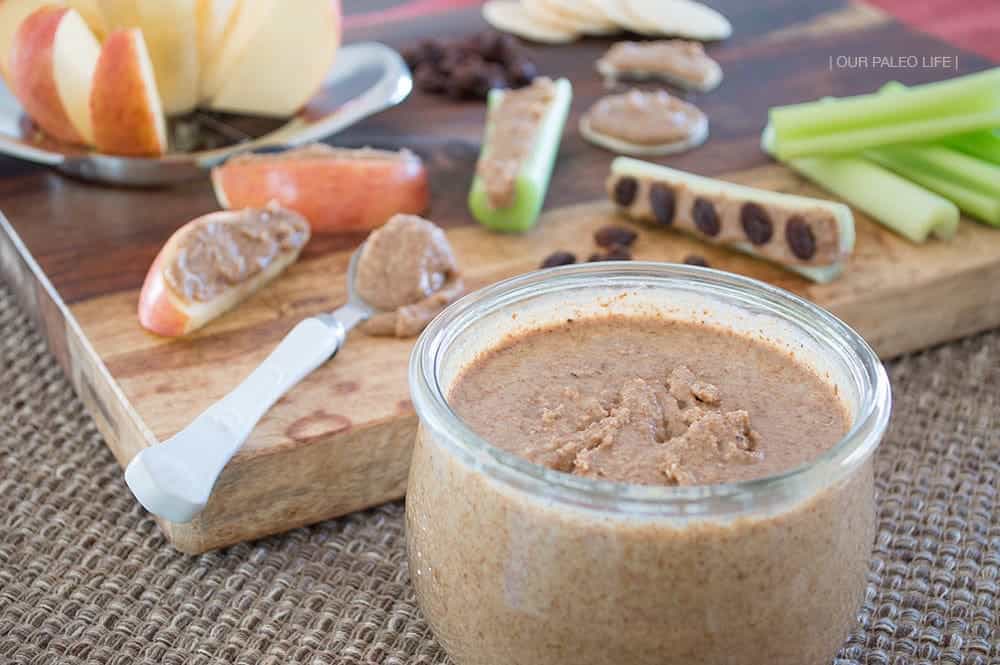
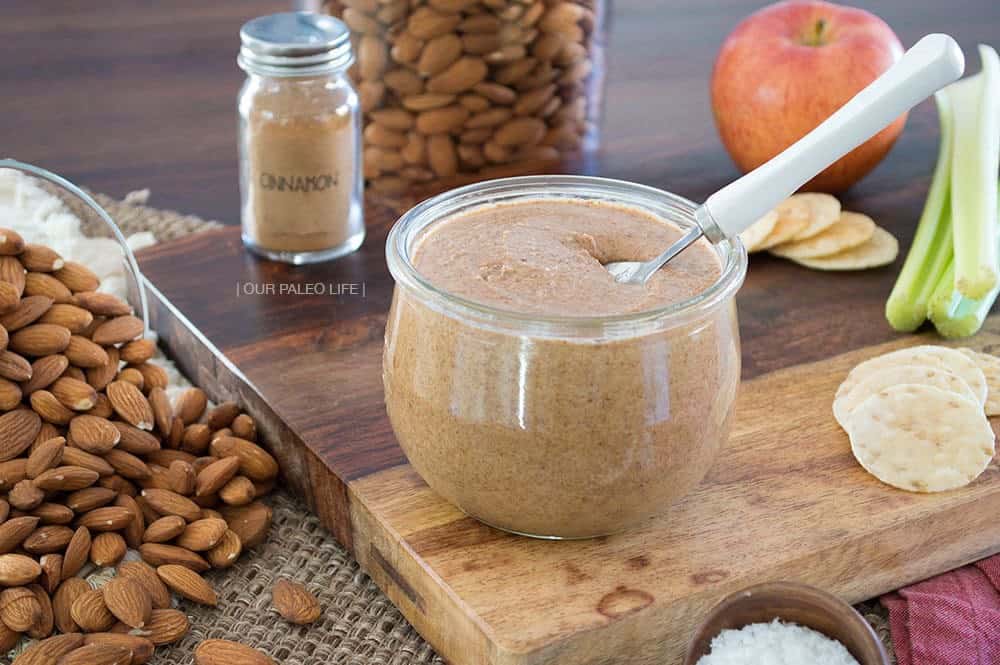
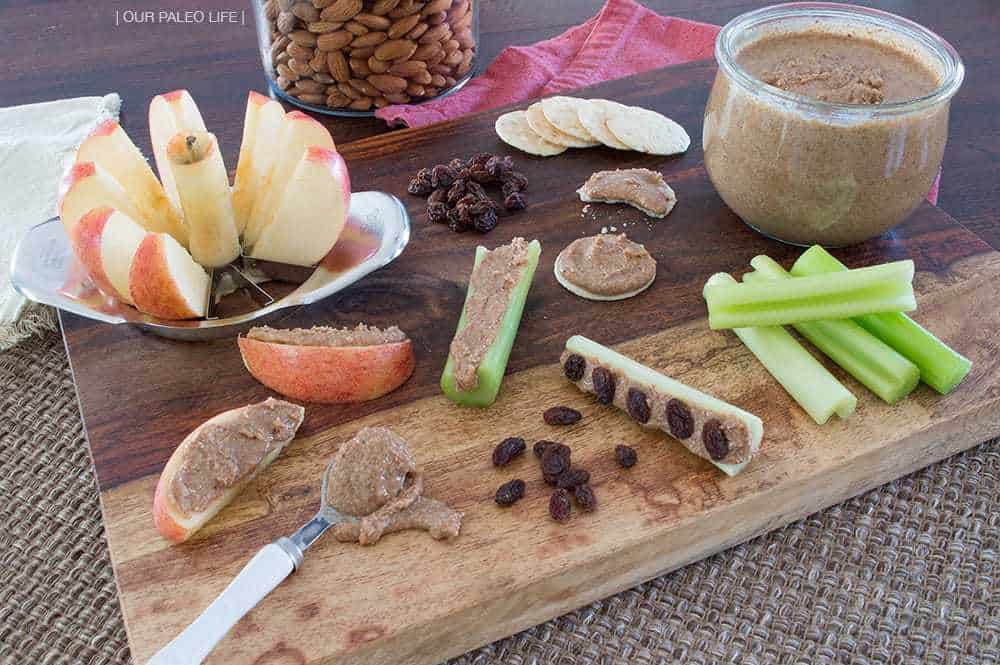
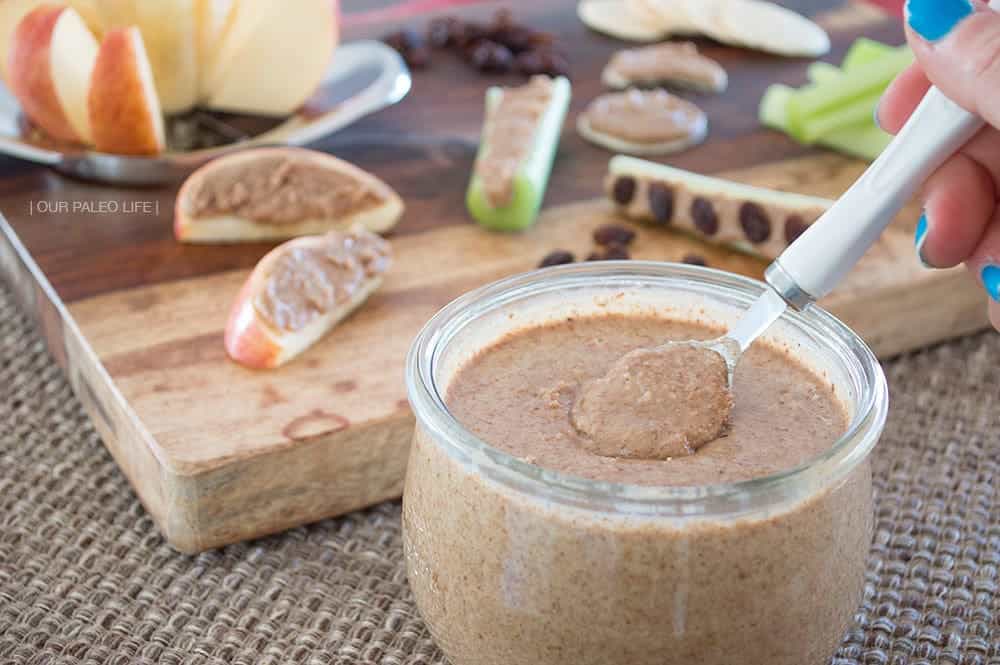
Our favorite way to eat almond butter is on sliced apples and bananas, or on celery sticks with raisins (ants on a log!). Because nut butters are really the only reason anyone eats celery, amiright?

View Full Recipe

Click the button to see the exact, printable recipe with ingredient list, instructions and timer.

Recipe: Maple Cinnamon Almond Butter

The post Maple Cinnamon Almond Butter appeared first on Our Paleo Life.

Apple Cider Caramels {dairy-free}

$
0
0

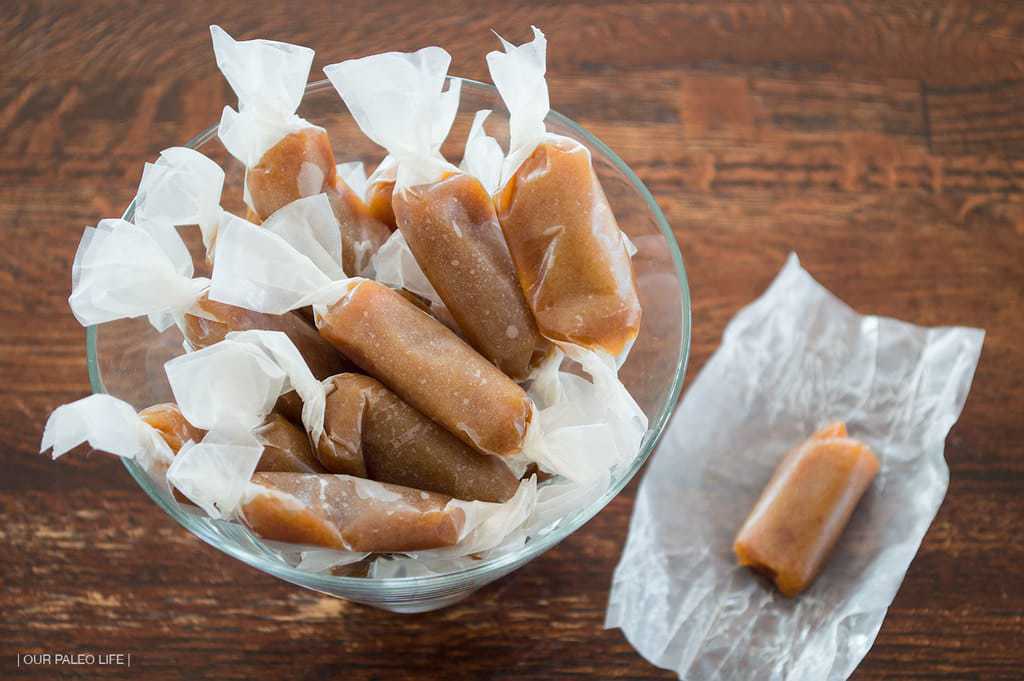
Apple Cider Caramels {dair-free, no corn syrup} by Our Paleo Life

Many, many, many Christmases ago (okay, maybe it was only 8-ish years, but it feels like way more), I decided it would be fun to whip up about 8-10 different holiday treats for about a dozen different families. I went all out, for real. I got these adorable little candy-striped boxes, and holiday bags and set to work making cookies, caramels, candies, meringues, chocolate bark, etc, etc, etc. You get the point, I made a LOT of treats. And I packaged them up all in their little boxes and bags, each treat in it’s own designated container. And I carefully packed each set in a box and shipped the goodie boxes out to out-of-town family and friends. And when I was done, I swore off all baked goods (that lasted until about January).

Apple Cider Caramels {dairy-free, no corn syrup} by Our Paleo Life

The truth is: I love baking. I love candy making. But, it’s not sustainable and healthy to only do that and never cook. So I’m trying, really I am, to get some non-sweets on the blog right now, but my gosh, the holidays make that SO hard. So today, I gave in. Today is for sweets. I do have a couple actual real-food recipes in the queue, I’ll try to expedite them for you because they are too good to keep to myself.

Apple Cider Caramels {dairy-free, no corn syrup} by Our Paleo Life

Now back to sweets. A couple months ago, I ordered some Cocomels in my Thrive box (have you signed up yet?) because I try to always put a “mom treat” in my order. That set in motion a rekindled love of caramels for me. I had been wanting to make some again but never got around to it. That is until last week. While browsing Pinterest, as I often do, I came across some Apple Cider Caramels and I was all “Wha? That’s amazing!”. So I promptly ran to Whole foods and grabbed two more jugs of cold-pressed apple cider (well, I needed some for drinking too!).

Apple Cider Caramels {dairy-free, no corn syrup} by Our Paleo Life

The first moment I had an hour to spare, I quickly scrubbed a pot (what, you think my kitchen is always clean?!) and got to boiling. These caramels could not have come out any better. I am so in love with them. I also can’t stop eating them, so I brought them to a friend’s house and “accidentally” forget them in her fridge so I will stop gorging on them. She’ll thank me later…

Apple Cider Caramels {dairy-free, no corn syrup} by Our Paleo Life

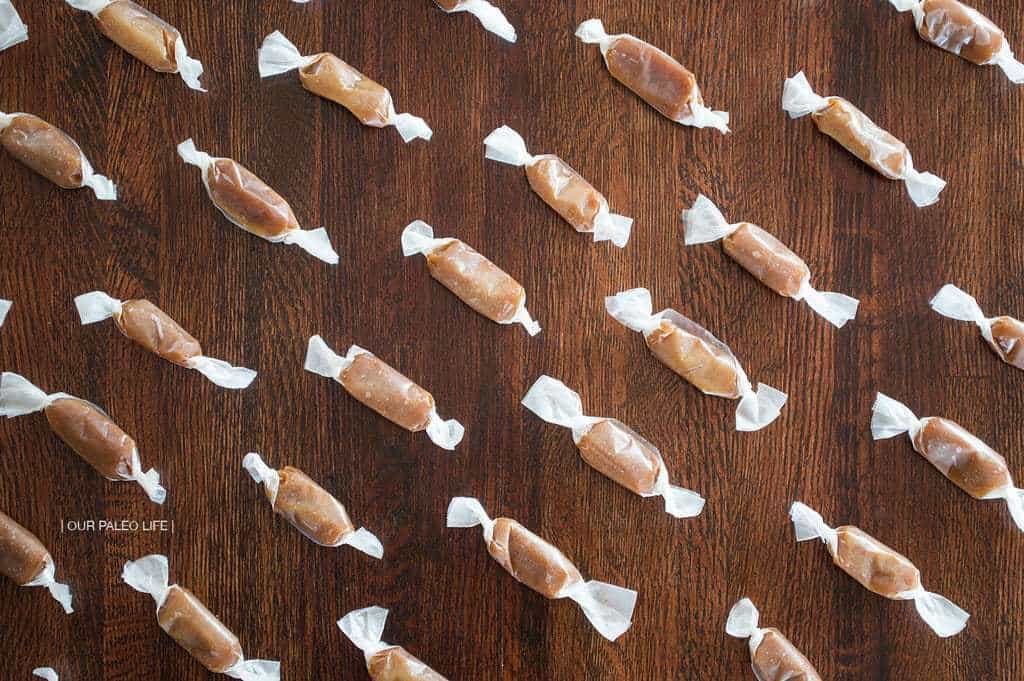
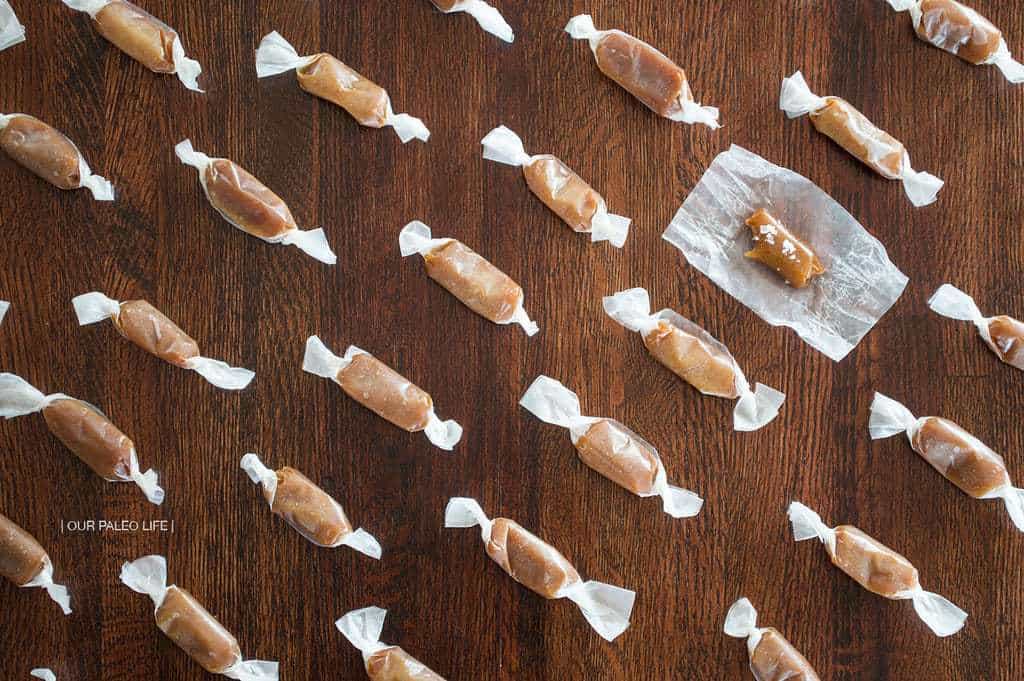
I prefer tiny little chunks of caramel, so I cut mine on the smaller side, about 1/2″ x 1″, that way I don’t feel bad when I eat a bunch because they’re so tiny, literally bite-size, so it’s okay. Right? Just tell me it is.

And when you make these, pay close attention to the last step. It’s important. Trust me.

View Full Recipe

Click the button to see the exact, printable recipe with ingredient list, instructions and timer.

Recipe: Apple Cider Caramels

The post Apple Cider Caramels {dairy-free} appeared first on Our Paleo Life.

Cherry Buttercream Frosting

$
0
0

Cherry Buttercream Frosting by Our Paleo Life

Have you ever had plans to do something, then something else happens that sidetracks you and it takes you a while to get back to it? Yeah, me too. Like this recipe. I’m actually embarrassed to say I started on it back in July 2014. Is 18 months too long of a sidetrack?

Maybe it was meant to be that way. Because at the time, I didn’t really have a chocolate cake recipe I really loved and it wasn’t until I discovered the magic that is cassava flour that I was able to create the best grain-free chocolate cake I’d ever eaten (or any chocolate cake, for that matter). And this frosting pairs so perfectly with that chocolate cake, so I think it was meant to be that I waited this long to get it done.

Cherry Buttercream Frosting by Our Paleo Life

What I really love about this frosting is that it can made with or without dairy. Truth be told, I love butter in frosting, but I know not everyone can tolerate it well (myself included, though I do torture myself simply because I love the taste). So if dairy isn’t your thing, go without the butter and know this will still taste great.

The real turning point for me was the powdered sugar, though. In all my pre-paleo baking years, I was a buttercream master. I had perfected the almond buttercream frosting, but trying to make it without powdered sugar would be next to impossible. I tried many paleo variations using different techniques, but none were really great enough for me. I did make some swiss meringue buttercream to go with my chocolate cake, and while it really is great, I missed the plain old buttercream. Then I realized I could make my own powdered sugar with granulated maple sugar. Lightbulb!

Cherry Buttercream Frosting by Our Paleo Life

So armed with my trusty Blendtec, I powdered up some sugar and made a delicious cherry buttercream frosting and couldn’t be happier. My husband thinks it’s just not right to add fruit to desserts, so he would prefer this as a plain almond buttercream which would be easy enough. Just leave out the cherries and add a little coconut milk to the desired consistency, but why would you leave out the cherries?! I mean, come on, it’s cherries!

Cherry Buttercream Frosting by Our Paleo Life

Speaking of cherries, we planted a Montmorency cherry tree in our yard last fall. I can not wait to eat cherries straight off the tree. It’s fairly mature already, so fingers crossed for cherries this year.

Now go, make some cupcakes and frost them with this gorgeously pink frosting and maybe share some with the fruity dessert lovers in your life.

Cherry Buttercream Frosting by Our Paleo Life

View Full Recipe

Click the button to see the exact, printable recipe with ingredient list, instructions and timer.

Recipe: Cherry Buttercream Frosting

The post Cherry Buttercream Frosting appeared first on Our Paleo Life.

Continuous Brew Kombucha (Step-By-Step & How-To)

$
0
0

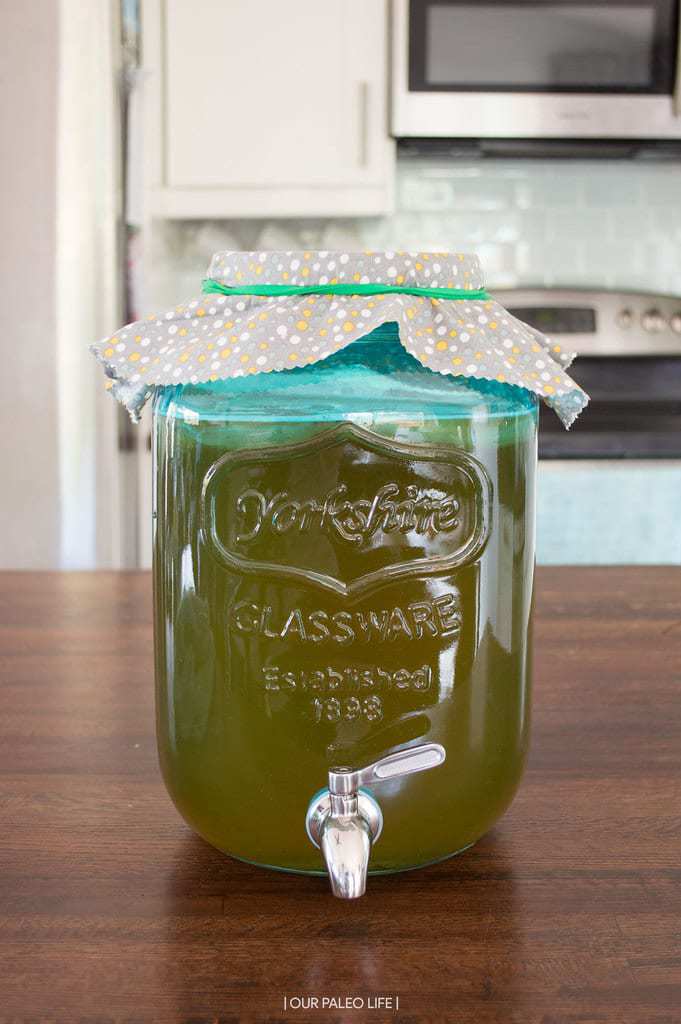
Continuous Brew Kombucha System

Continuous Brew Kombucha System

For many years now, our family has been drinking kombucha. From the days when, upon hearing the word “kombucha”, we were met with faces of utter confusion and questions like “kombu-what?!” to now, when we get replies of “Oh, what brand is your favorite” and “I make my own at home”. This centuries-old probiotic-rich drink has come a long way in recent years.

While there are a lot of fantastic brands you can buy in any chain grocery store these days (GT’s is our favorite), the monthly cost of drinking a 16 oz bottle of kombucha a day is pretty significant. For just 2 people to drink 1 bottle of kombucha a day, the store-bought cost can be between $200-$400 a month! That’s insane for just a daily beverage.

Continuous Brew Kombucha System

Because of this significant cost, I decided to try my hand at making my own at home. A few years ago, I setup a system in my pantry. It was not a continuous brew (which is what I’ll be discussing in this blog post) and I didn’t have much success. We didn’t like the flavor, the maintenance was too frustrating for me, and I gave up.

Fast forward to now, my continuous brew kombucha system is thriving and we love the results. In my experience, the continuous brew is absolutely the way to go. What we have right now is sufficient for sustaining 2 adults with daily kombucha, so I will likely double our production so there’s enough for the kids as well (so they will stop drinking ours!).

Getting started with your own continuous brew system is actually pretty simple. You will need to initially invest in some supplies, but the cost breakdown is much cheaper than a daily habit of picking up a bottle at the local Whole Foods.

Continuous Brew Kombucha System

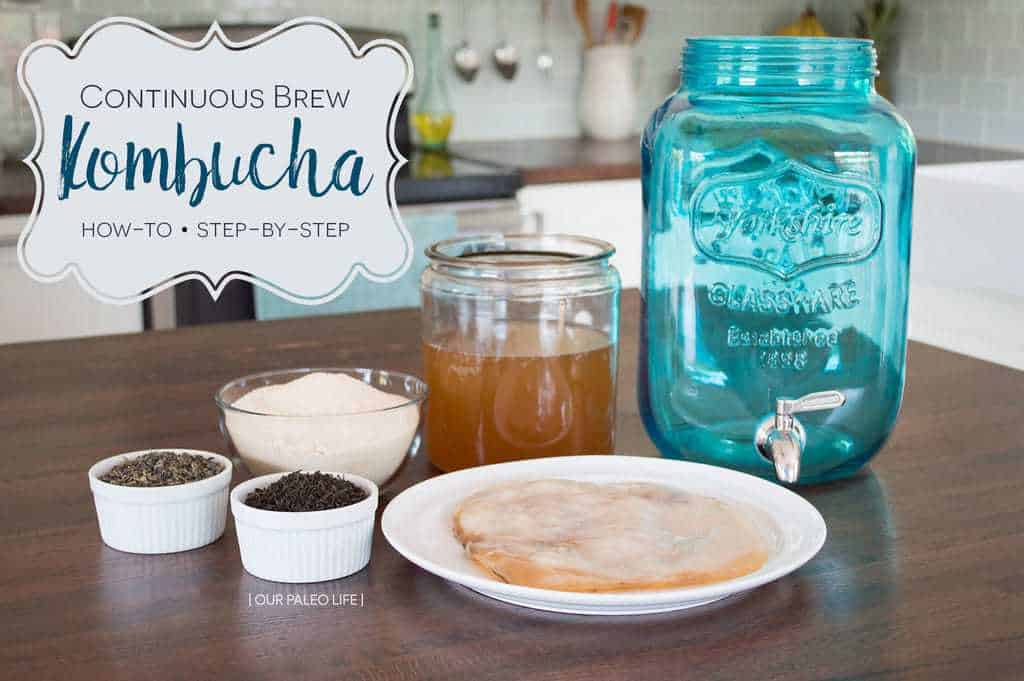
Here’s what you’ll need to get started:

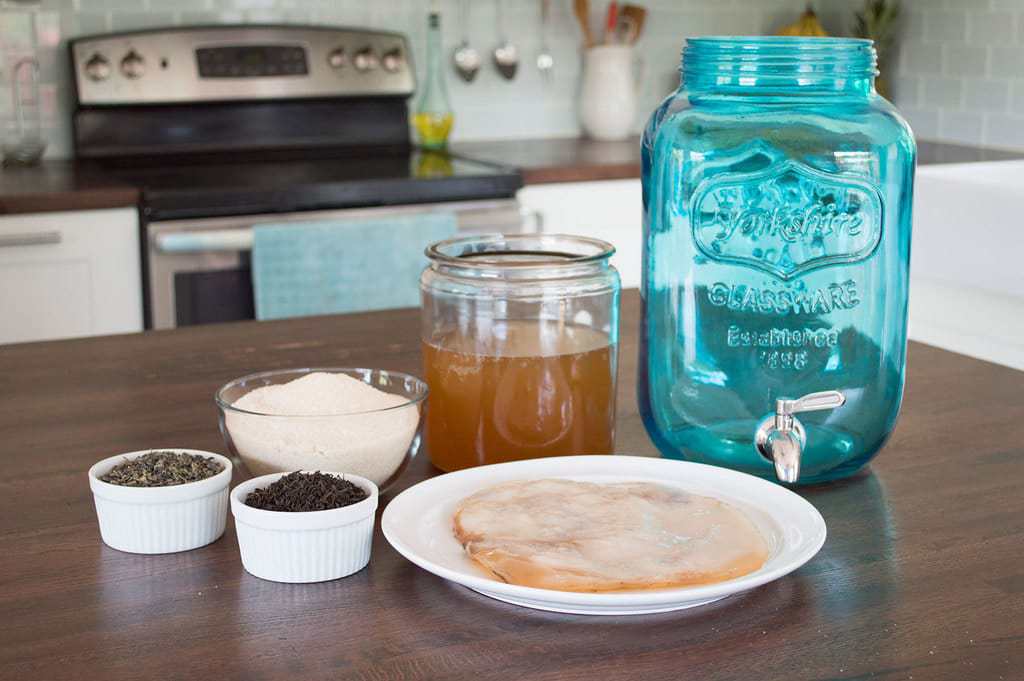
  • A crock to brew in (we use a 2.2 gallon which is the perfect size for (2) 16oz drinks per day)
  • A tight-weave piece of fabric large enough to cover the opening of the crock with overhang on the edges (cheesecloth will not work, the weave is too loose and will let fruit flies in; organic quilting cotton is a great choice)
  • A large rubber band to hold the fabric on the crock
  • A brew-safe spigot for the crock. Plastic is great, but avoid the metal-look plastic ones, they flake off into the kombucha. We use a brew safe metal spigot (more on problems with metal later in the post)
  • Bottles (swing-top are best, but reusing store-bought kombucha bottles is fine too)
  • Organic Cane Sugar
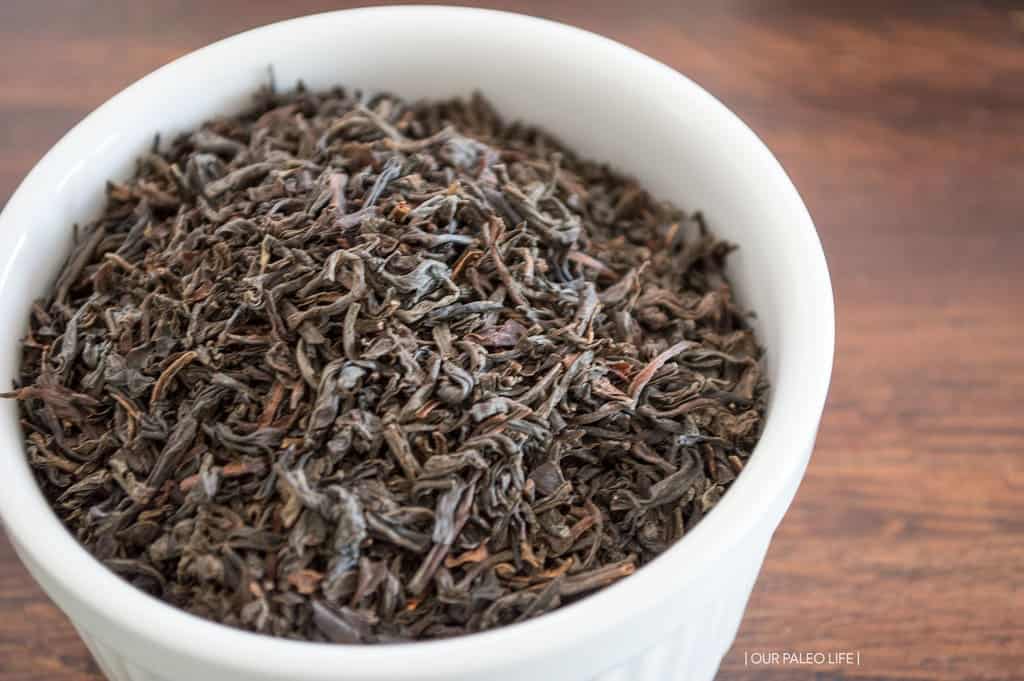
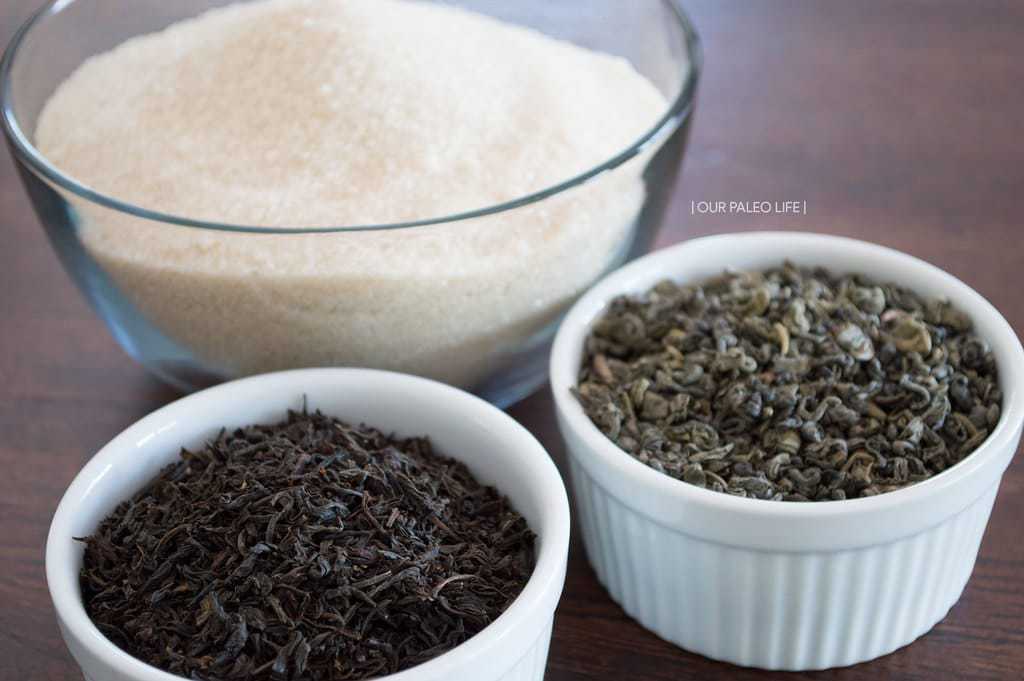
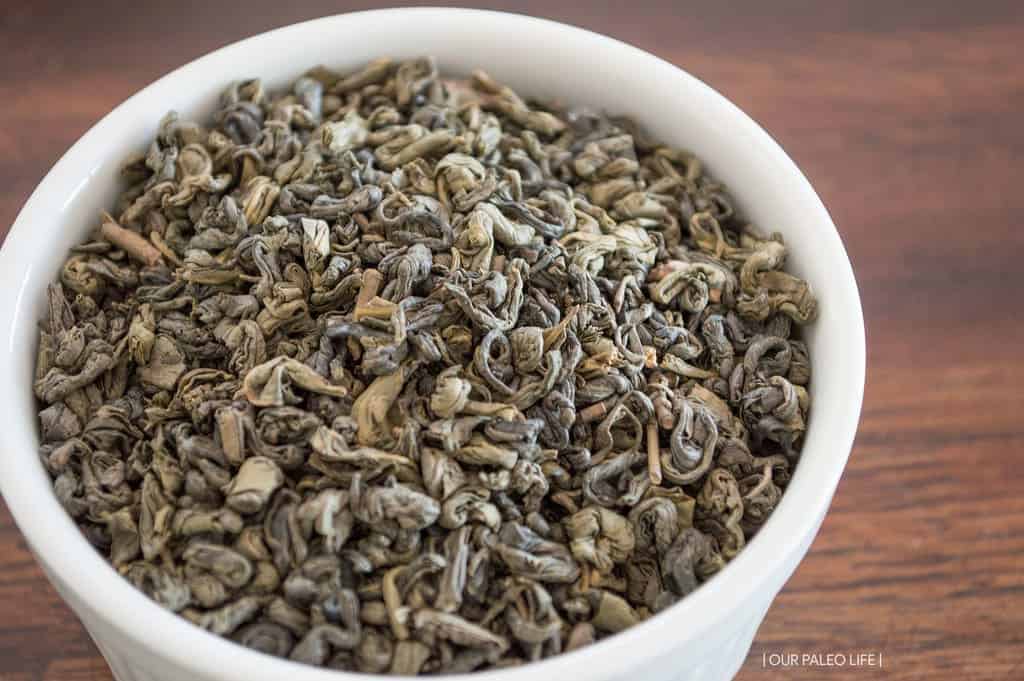
  • Black, green, and/or white tea (we prefer a 50/50 blend of black tea and gunpowder green tea)
  • A SCOBY, or symbiotic colony of bacteria and yeast (while you can buy these online, it is best to try and find a friend or neighbor that has one they are willing to share with you)
  • Starter tea (if you’re getting your SCOBY from a friend, they will likely give you a cup or two of starter tea to go along with it)

Now that you’ve got the basic materials and ingredients, how do you use them to make your own kombucha and maintain a low-maintenance continuous brew system?

Continuous Brew Kombucha System

First things first, brew your tea. This is not your starter tea that you get with your kombucha, but the plain sweet tea that you add to the starter tea. The size of your crock will determine how much sweet tea you have to make. If you’re using a 2.2 gallon crock, 2 gallons of tea fits perfectly. If you only have 1 cup of starter tea, you should only start with 1 gallon of sweet tea, let that ferment, and on your second batch, bump up to the full 2 gallons. If you’re fortunate enough to get 2 cups of starter tea, you can go with 2 gallons of sweet tea right off the bat.

Everyone uses a different combination of teas to make their own kombucha, but my preferred combo is 50/50 black/green. To be more exact:

To brew the tea, I only use 1/2 gallon of water for all that sugar and tea. In a pot large enough to hold the 1/2 gallon of water, I add the water and sugar. For the loose tea, the easiest method I’ve found is to place a metal fine-mesh colander in the pot and place the loose tea leaves in that. Bring the water to a boil with the tea leaves in it, remove from heat, and let steep for about 30 minutes. This creates a nice, strong tea. Then simply lift the colander out of the tea and discard the tea leaves.

The reason I only use 1/2 gallon of water instead of the full 2 gallons is because I can cool it down faster by adding the remaining 1.5 gallons of cold water. You know how if you add fish to a fishbowl of water that is too hot or too cold it will kill them? Same goes for the SCOBY. The brewed tea needs to be close to room temperature to keep it alive.

Continuous Brew Kombucha System

Once you have brewed your tea and it’s close to room temp, before you start anything else, you must be sure to sanitize everything you’re using. The crock, spigot, bottles, everything. Don’t use dishsoap for this, just hot water and a rinse in vinegar will be just fine. And residual soap will be detrimental to the SCOBY, so avoid using it altogether.

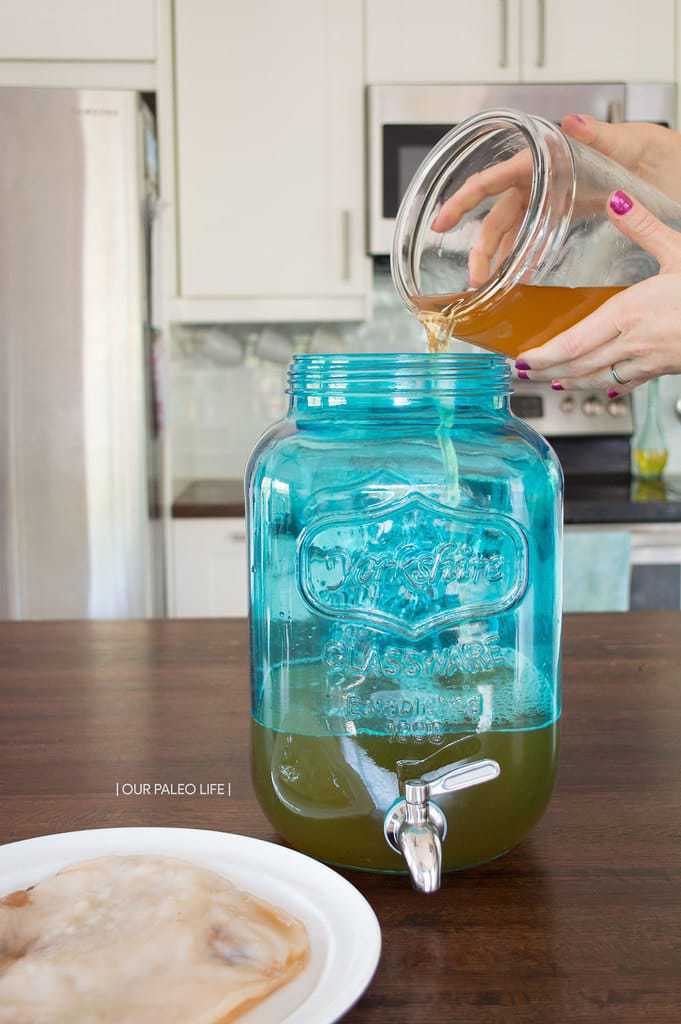
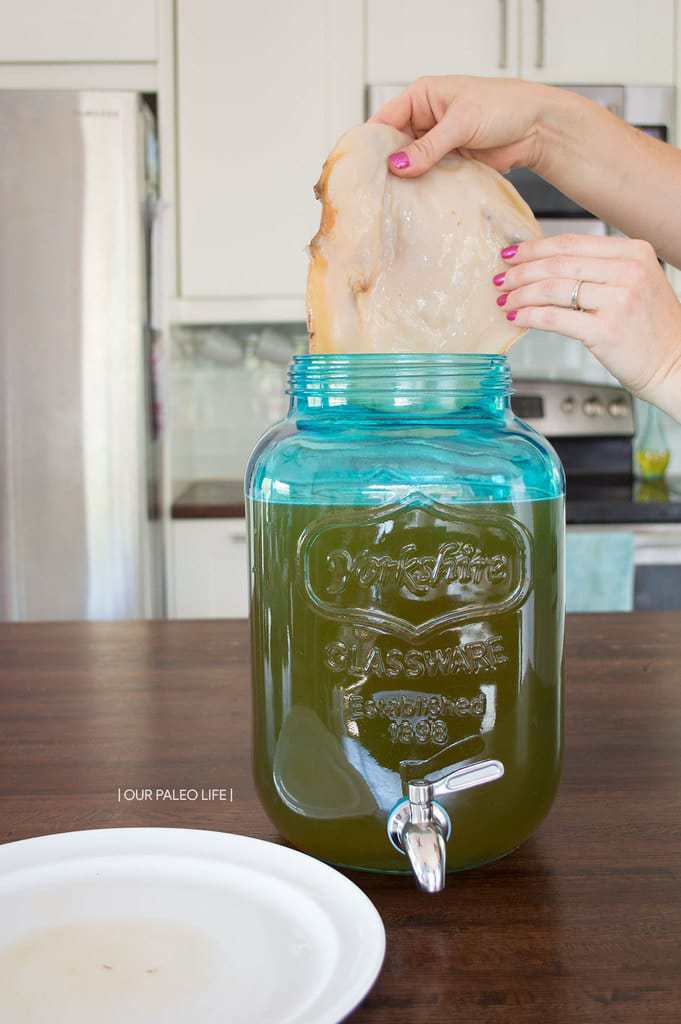
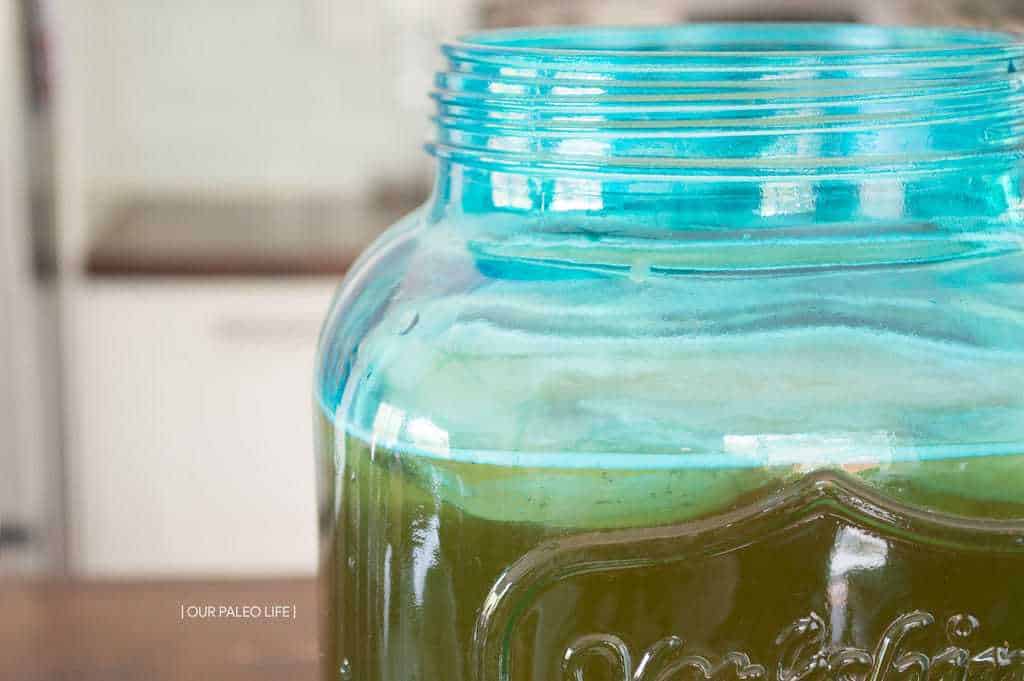
Once everything (your hands included) is sanitized, pour your starter tea and brewed sweet tea into the crock. Learn from me and be absolutely positively sure that the spigot is closed before you pour in your tea. Not 1/2 open, but absolutely closed! Trust me. Very gently, place your SCOBY into the tea, trying to keep it on the top surface. It may sink to the bottom or even just float around the middle, and that’s fine. It will eventually find it’s way back to the top. Place the tight-weave fabric (quilting cotton is actually perfect for this) over the top and secure it with the rubber band.

Continuous Brew Kombucha System

Now you wait. The first fermentation has begun. Side note, I’m a tad bit forgetful (understatement of the year), so I like to write the date I start the fermentation on the side of the crock. A liquid chalk marker is perfect for this. It wipes off easily each time so I can change it with the next batch.

To determine when you should start to bottle the kombucha is a personal preference and also depends on the room temperature. If your kombucha is in a cool or drafty location, the process could take up to 2 weeks. If you have no other options for location, you could wrap traditional twinkle lights (not the new LED ones) around the crock to increase the heat, or get an actual heater meant for this. If the room temperature is too hot (like our kitchen in the summer months), the first ferment will take just days.

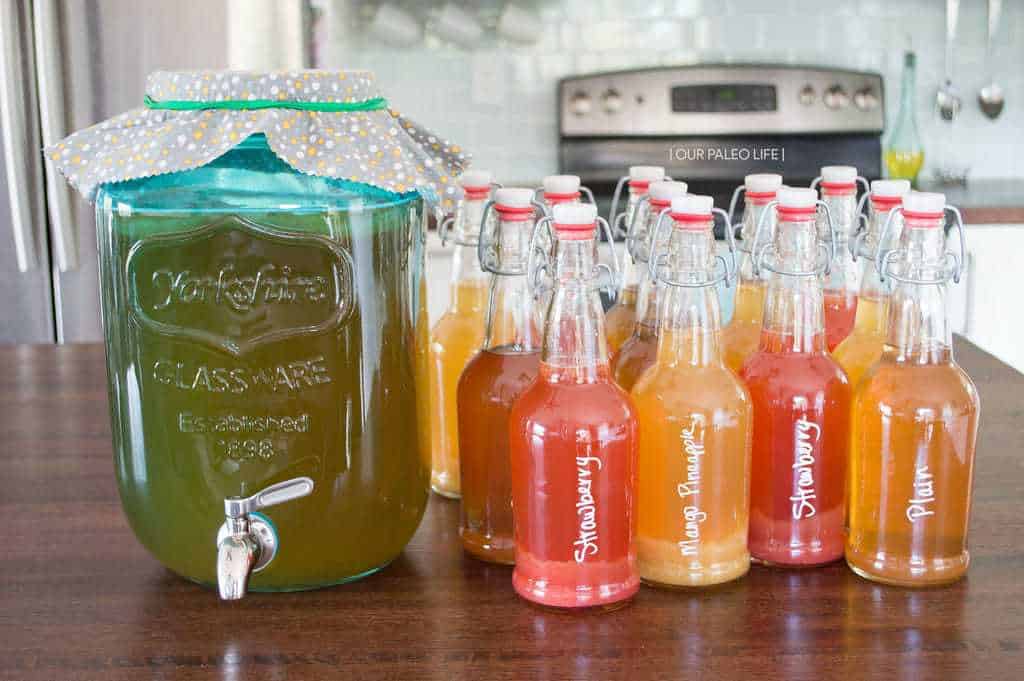
After about 3-4 days, I start to taste it. Once the sweetness is mostly gone (but still there just a bit) and the vinegary taste is more prominent, it’s time to bottle. The fastest way to do this is to fill a pitcher (glass is best, but I do use plastic on occasion), then using a non-metal/reactive funnel, pour the kombucha into each bottle. Make sure to leave some space to add about 1-2 ounces of fruit puree or juice if you plan to flavor your kombucha (some flavor ideas are at the end of this post).

Continuous Brew Kombucha System

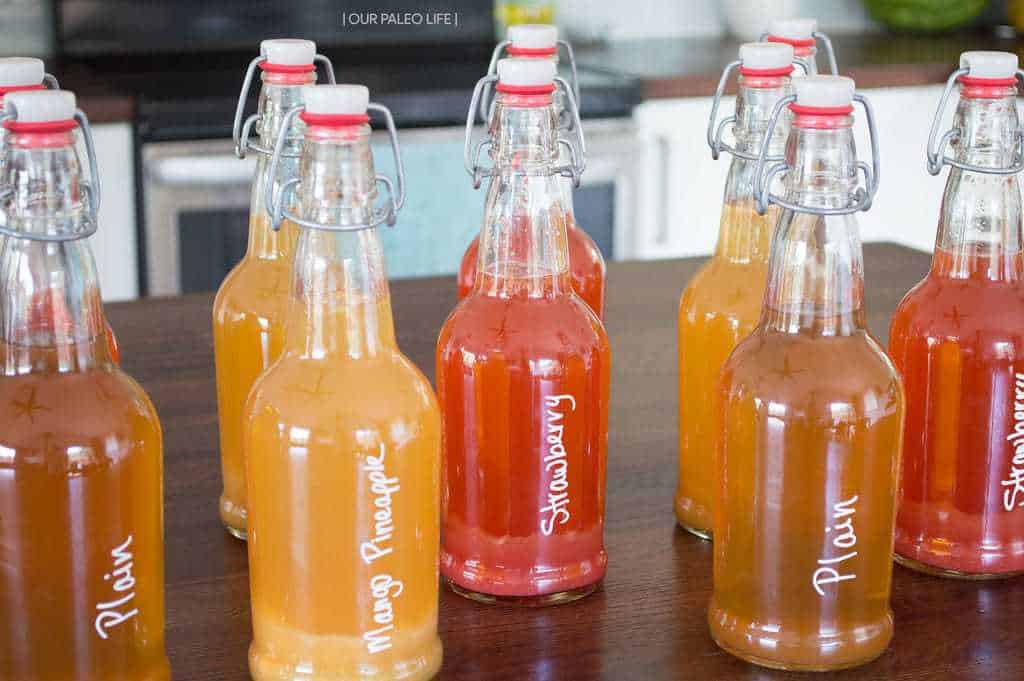
Once you’ve filled your bottles with kombucha and flavors (and labeled them with that same liquid chalk marker), close them up tight and leave them at room temp for another 3-5 days for the second ferment. This is when that beautiful carbonation process happens. The sugars in the fruit keep the fermentation process going and create bubbly goodness. The higher the sugar content in your fruit (like strawberries), the faster this second ferment will be. After the first 2 days, you may want to “burp” the bottles to get a gauge on the process and make sure they don’t over-carbonate (exploding bottles are no fun!). To burp, just very barely open the top to let out some air and quickly close it. If you get a bunch of fizz very quickly, your second ferment is done. This really shouldn’t need more than 3-5 days.

Once you’ve got a nice second ferment done, place the bottle in the fridge. The cold temperature will stop the fermentation process. Now you’ve got a nice batch of kombucha ready to go all week.

Continuous Brew Kombucha System

But that was just the first batch. How does the “continuous” part of this work? Well, basically the same as the first batch, except that you’re not having to clean and sanitize the crock and spigot each time. When you draw the kombucha off for your first bottling, leave about 1/4 of the kombucha in the crock. This will serve as your starter tea for your next batch. This also means that from here on out, you only need to brew 1.5 gallons of tea each time. This means:

Once you’ve brewed and cooled your tea, remove the SCOBY (with sanitized hands, of course) and set it aside, pour in the tea, and add the SCOBY right back. Done. This should only need to be done once a week, if the temperature is right and your first ferment is done in 5-7 days.

Our Favorite Flavors (so far…)

Add 1-2 ounces of flavor to each 16-ounce bottle

Continuous Brew Kombucha System {our favorite flavors}

Strawberry

2 cups Fresh Strawberries
A bit of Plain Kombucha to thin it out

Cherry

1 cup Tart Cherries (fresh or frozen, thawed)
2 tsp Sugar (to enhance carbonation)
A bit of Plain Kombucha to thin it out

Blueberry Lemon

1 cup Blueberries (fresh or frozen, thawed)
Juice of 1 Lemon
2 tsp Sugar (to counteract the citrus and enhance carbonation)
A bit of Plain Kombucha to thin it out

Mixed Berry

1 cup Mixed Berries
Juice of 1 Lemon
1 tsp Sugar (to counteract the citrus and enhance carbonation)
1″ Grated Ginger
A bit of Plain Kombucha to thin it out

With all the fruit purees I make, I strain them through cheesecloth, a nut milk bag, or a metal mesh strainer. It’s okay to use metal at this step because it is not coming in direct contact with the kombucha itself. Straining the puree makes the texture of the end product much more palatable, so you don’t have chunks of fruit or seeds to contend with.


Helpful Info

  • For more info, tips, advice, experiences, failures, success, and new flavors, be sure to follow along on Instagram using the hashtag #OPLkombucha.
  • Metal should never come in contact with kombucha or the SCOBY. It is okay to brew the tea in a metal pot, or to strain the fruit puree in a metal mesh colander, but the kombucha itself cannot touch metal. The exception to this rule is stainless steel with no lead in it. We do use a metal spigot and the flow rate is phenomenal!
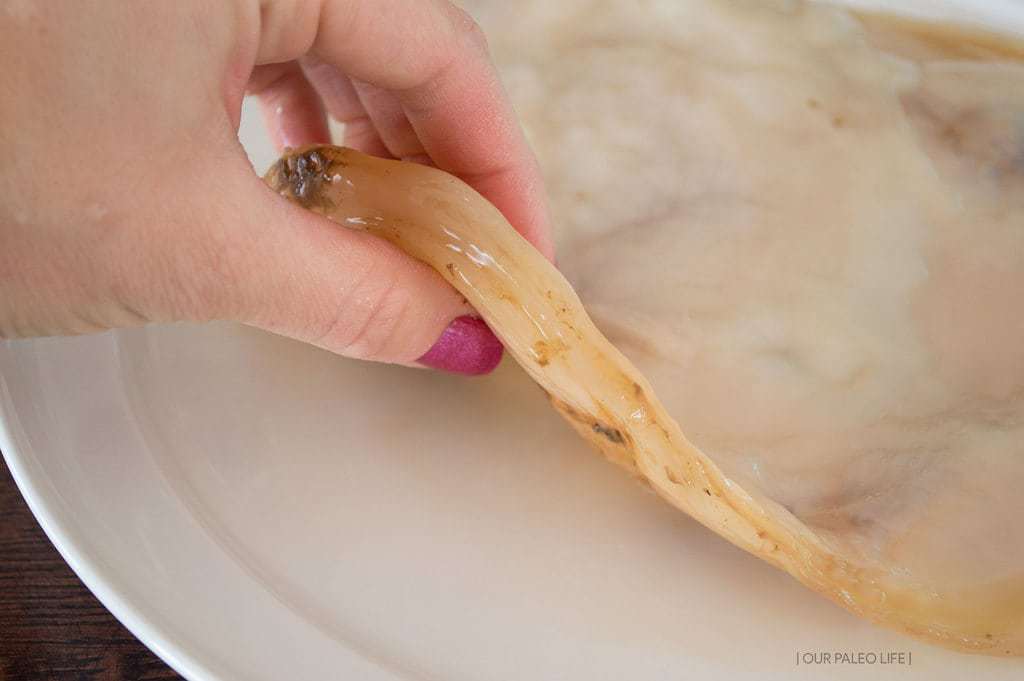
  • After you’ve been brewing a while, your SCOBY will get pretty big. It grows a new layer with each batch. Peeling off layers and keeping them in a “SCOBY hotel” (a smaller crock with extra sweet tea to keep them from drying out, cover with a tight-weave fabric just like the brewing crock) is a good way to hang on to extras in case something causes yours to die, you want to expand your system, or you have a friend that would like to begin brewing their own.
  • Get creative with your flavors. Fruits with low sugar content may need a boost with a teaspoon or two of sugar to help the second ferment get the kombucha bubbly enough. Adding sugar is not creating a sugary drink, it is aiding in the secondary fermenting process to create the carbonation.
  • Citrus will kill the carbonation in the second ferment, so pair citrus with high-sugar fruits or add a teaspoon or two of sugar to aid in the carbonation of the secondary ferment.
  • Kombucha ferments faster in warmer temperatures but try to keep it out of direct sunlight.
  • If you notice a large layer of yeasty buildup in the bottom of the crock after a long time (I’m talking many months up to a year), you can remove the remaining tea after a bottling session and the SCOBY, and resanitize everything, removing the extra buildup in the process. It’s like spring cleaning.
  • SCOBYs don’t last forever. When it starts to get big (think a couple inches), peel off the top layer and either throw it in the SCOBY hotel, or repurpose it. There are a few ideas floating around on Pinterest (none of which I have tried yet), but I prefer to feed it to my chickens. They LOVE it and it’s such a great treat for them.
  • If your SCOBY is on it’s last leg or has already died, here are some signs to look for:
    • a change in texture (like turning leathery or gummy);
    • mold, fuzzy/green/blue/white/red/etc but not the stingy brown stuff that’s normal on a SCOBY from the tannin in the tea (you will have to restart the entire system if you find mold, sanitizing everything);
    • the SCOBY no longer floats back up to the top of the crock

And just for fun, if you’re curious like I was, here is the cost breakdown per bottle of homemade kombucha. This does not take into account the cost of the startup supplies, including bottles, because they are reusable for many, many years.

This is only the cost of ingredients for the plain, unflavored kombucha (since the various fruits/flavors are variable costs).

Total Cost: $2.08 for 1.5 gallons

1.5 gallons = 12 bottles of plain, unflavored kombucha = $0.17/bottle

SEVENTEEN CENTS! $0.17 for the actual kombucha. Just for fun, let’s round that up to $0.30 per bottle with flavor added, which I really don’t think it’s that much the majority of the time. If you drink a bottle a day for an entire year, that’s $109.50/year per person. Compare that to store-bought every day for a year: $1095 – $1825/year per person. Just in case you needed a little more convincing that this is absolutely worth it. Plus, it’s so satisfying knowing that you are in complete control of what you’re consuming.

Continuous Brew Kombucha System

Do you have any tips, advice, personal experiences, or questions about home brewing kombucha? Share them in the comments. I’d also love to hear some of your favorite flavor combinations.
The post Continuous Brew Kombucha (Step-By-Step & How-To) appeared first on Our Paleo Life.

Vanilla Peach Fruit Leather {honey-sweetened; real fruit}

$
0
0

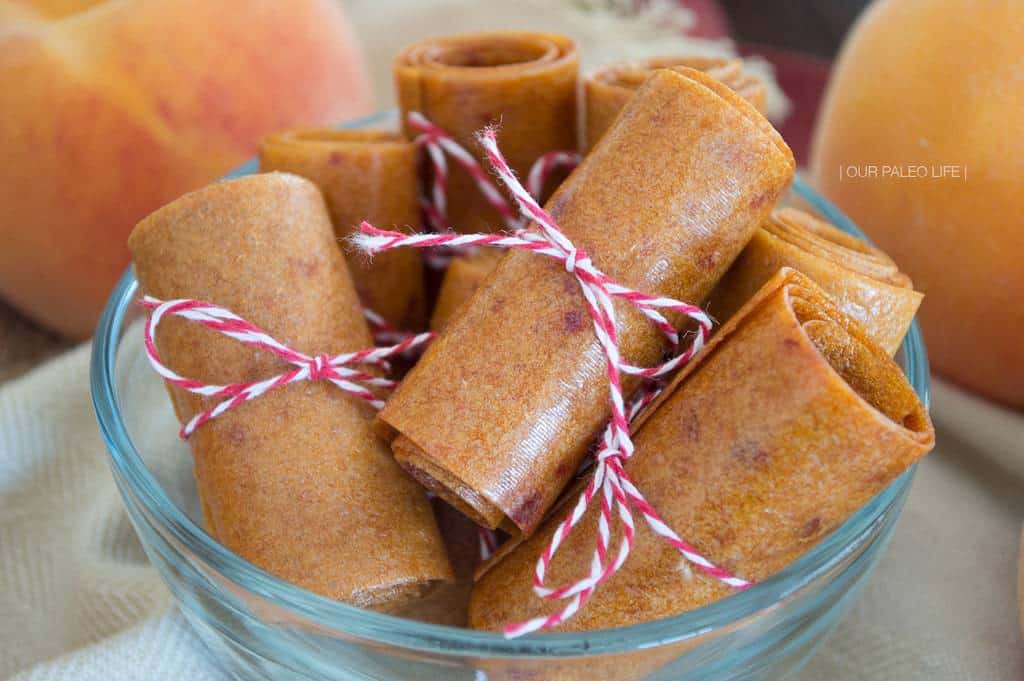
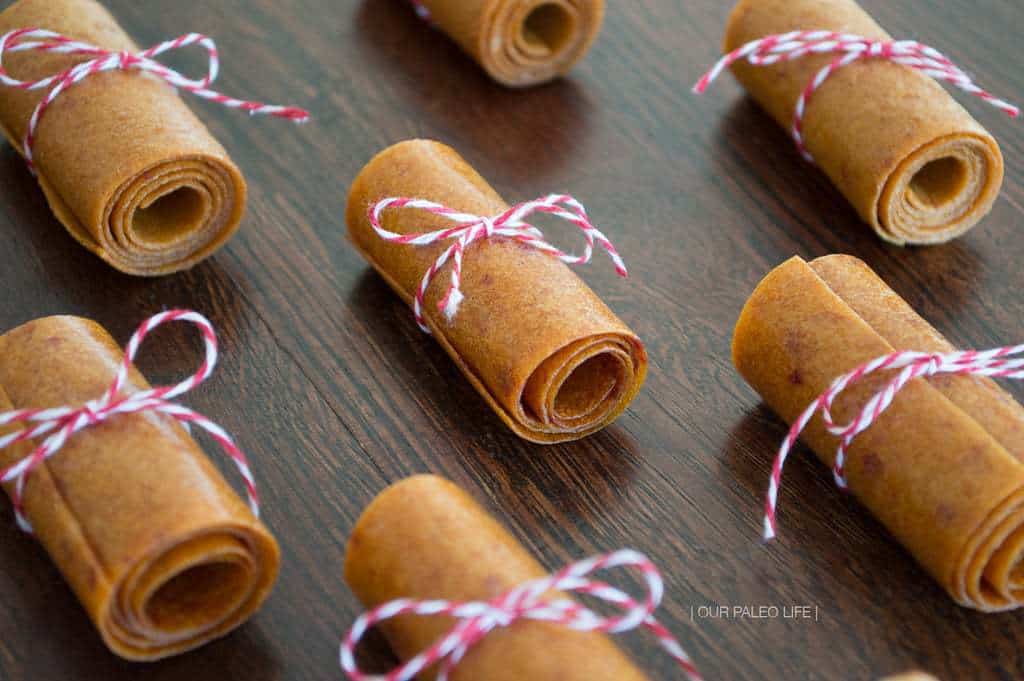
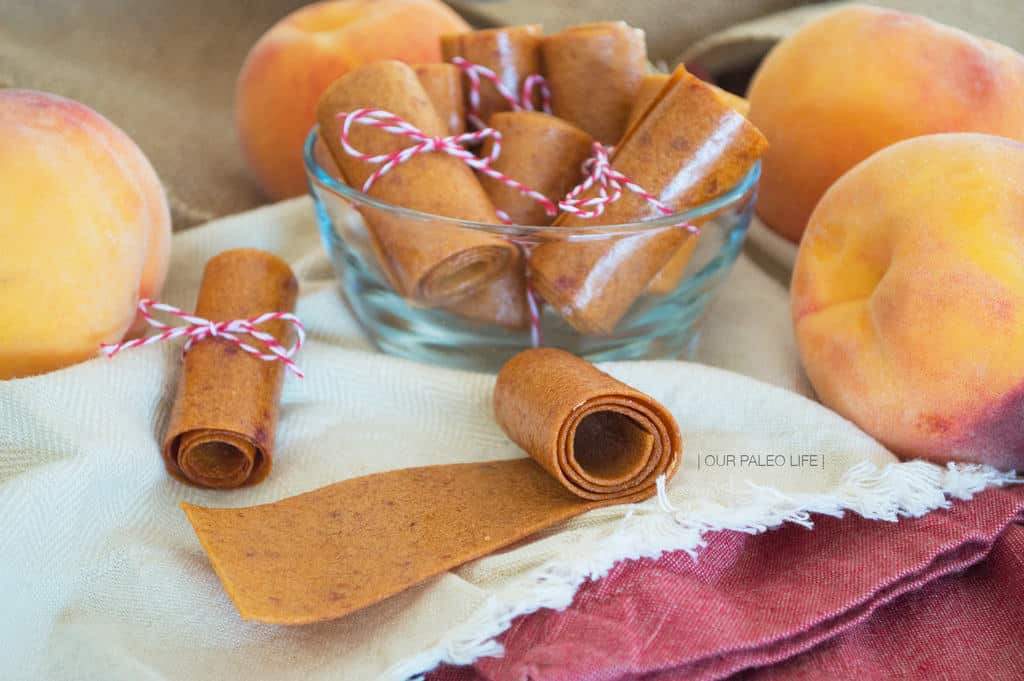
Peach Fruit Leather {honey-sweetened; real fruit}

For Labor Day weekend, our family took our last camping trip of the season. Just before we left, I realized I still had over 2 dozen peaches that would go bad if we left them at home for the 4 days we would be gone. So with 2 days to spare, I made as much as I could with those peaches.

Peach Fruit Leather {honey-sweetened; real fruit}

I made peach cake, peach jam (recipe coming soon!), and these peach fruit roll-ups. We ate all the cake before we left, but brought the jam and fruit leather (as well as some remaining fresh peaches) with us on our camping trip. The jam was so perfectly delicious on our pancakes, we didn’t even need maple syrup (which was good because we ran out of it).

Peach Fruit Leather {honey-sweetened; real fruit}

The kids loved being able to just grab a fruit leather whenever they felt like it, and I didn’t mind at all because it was just peaches and honey. Doesn’t get much more clean than that.

Peach Fruit Leather {honey-sweetened; real fruit}

View Full Recipe

Click the button to see the exact, printable recipe with ingredient list, instructions and timer.

Recipe: Vanilla Peach Fruit Leather {honey-sweetened; real fruit}

The post Vanilla Peach Fruit Leather {honey-sweetened; real fruit} appeared first on Our Paleo Life.


Applesauce Fruit Leather {no added sweeteners}

$
0
0

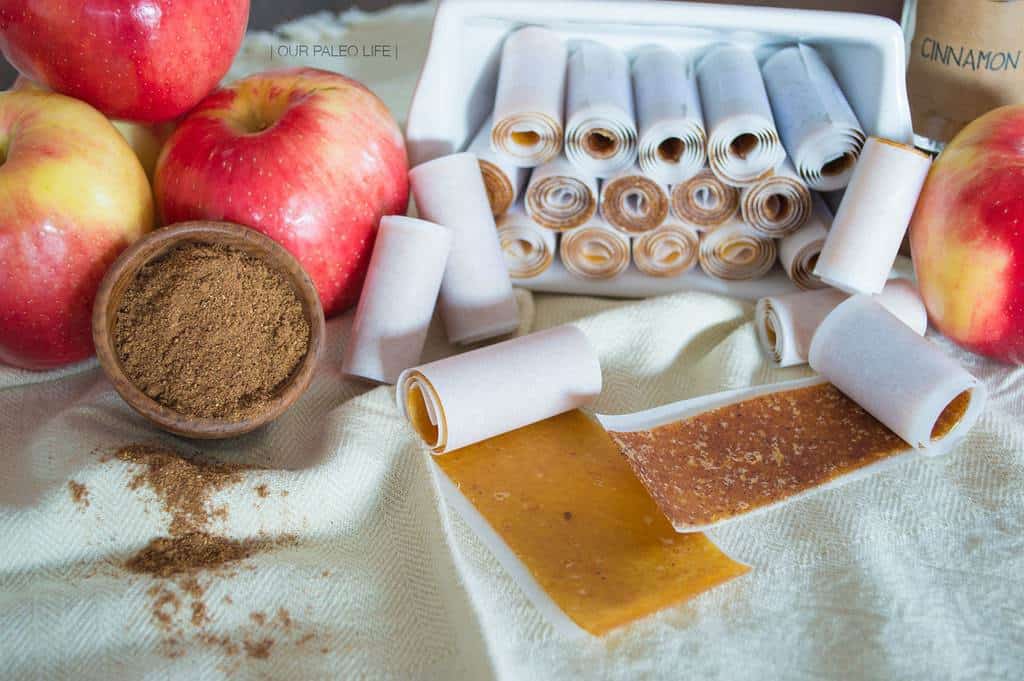
Apple Fruit Leather {no sweeteners added}

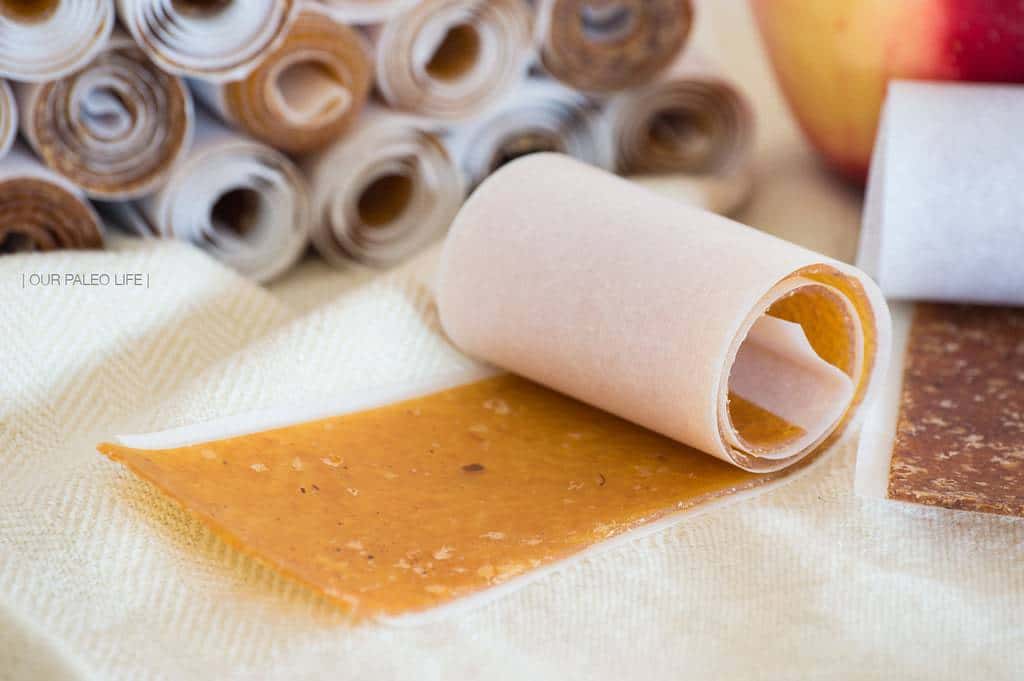
I’ve been on a dehydrating kick lately. When we had an overflow of peaches so I made fruit leather with them, as well as dehydrating slices (so good, by the way). The fruit leather was a hit with the kids, but I ran out of peaches, and wanted to use what I already had on hand.

Apple Fruit Leather {no sweeteners added}

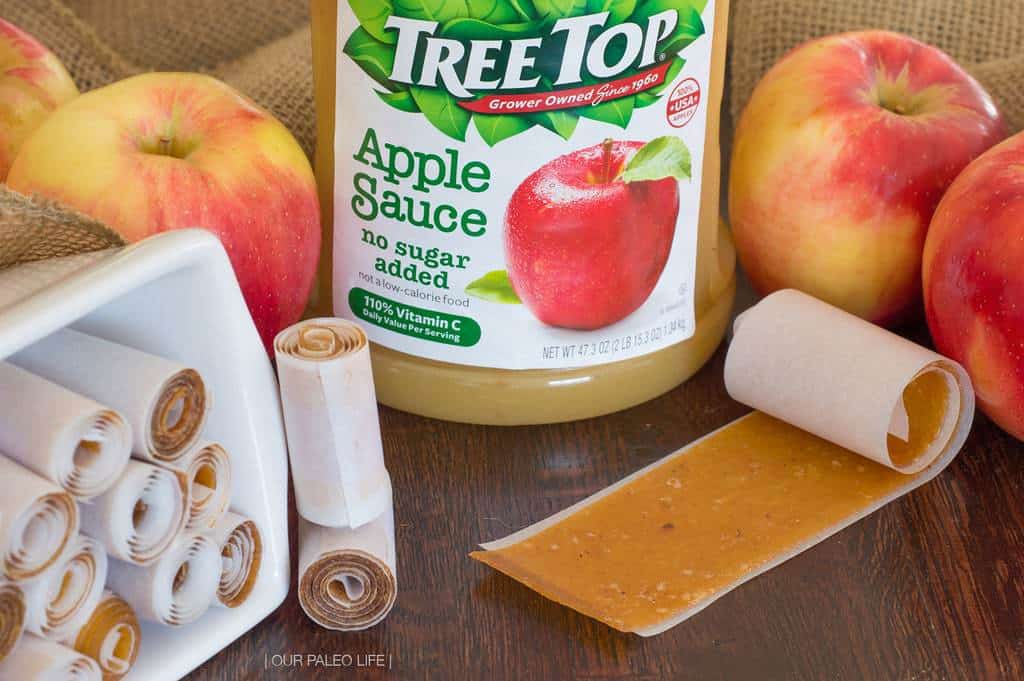
In addition to using what we already had, I wanted it to be easy. Doesn’t get much easier than using already-pureed food. We purchase our applesauce in 4-packs from Costco. I’m a big fan of cost breakdown, and based on the current price of the TreeTop Applesauce, these fruit leathers come out to about $0.15/piece.

Apple Fruit Leather {no sweeteners added}

The best part is that you can flavor these with anything you want, or just leave them completely plain. Dehydrating brings out the apple flavor so it’s not bland, and it concentrates the sweetness so there is no need for extra sweeteners, just pure fruit.

Apple Fruit Leather {no sweeteners added}

Plus, they look adorable all stacked up in little rolls, just waiting for their place in a lunchbox.

Apple Fruit Leather {no sweeteners added}

View Full Recipe

Click the button to see the exact, printable recipe with ingredient list, instructions and timer.

Recipe: Applesauce Fruit Leather {no added sweeteners}

The post Applesauce Fruit Leather {no added sweeteners} appeared first on Our Paleo Life.

Continuous Brew Kombucha (Step-By-Step & How-To)

$
0
0

Continuous Brew Kombucha System

Continuous Brew Kombucha System

Continuous Brew Kombucha System

Continuous Brew Kombucha System

Continuous Brew Kombucha System

Continuous Brew Kombucha System

Continuous Brew Kombucha System

Continuous Brew Kombucha System

Continuous Brew Kombucha System

Continuous Brew Kombucha System

For many years now, our family has been drinking kombucha. From the days when, upon hearing the word “kombucha”, we were met with faces of utter confusion and questions like “kombu-what?!” to now, when we get replies of “Oh, what brand is your favorite” and “I make my own at home”. This centuries-old probiotic-rich drink has come a long way in recent years.

While there are a lot of fantastic brands you can buy in any chain grocery store these days (GT’s is our favorite), the monthly cost of drinking a 16 oz bottle of kombucha a day is pretty significant. For just 2 people to drink 1 bottle of kombucha a day, the store-bought cost can be between $200-$400 a month! That’s insane for just a daily beverage.

Continuous Brew Kombucha System

Because of this significant cost, I decided to try my hand at making my own at home. A few years ago, I setup a system in my pantry. It was not a continuous brew (which is what I’ll be discussing in this blog post) and I didn’t have much success. We didn’t like the flavor, the maintenance was too frustrating for me, and I gave up.

Fast forward to now, my continuous brew kombucha system is thriving and we love the results. In my experience, the continuous brew is absolutely the way to go. What we have right now is sufficient for sustaining 2 adults with daily kombucha, so I will likely double our production so there’s enough for the kids as well (so they will stop drinking ours!).

Getting started with your own continuous brew system is actually pretty simple. You will need to initially invest in some supplies, but the cost breakdown is much cheaper than a daily habit of picking up a bottle at the local Whole Foods.

Continuous Brew Kombucha System

Here’s what you’ll need to get started:

  • A crock to brew in (we use a 2.2 gallon which is the perfect size for (2) 16oz drinks per day)
  • A tight-weave piece of fabric large enough to cover the opening of the crock with overhang on the edges (cheesecloth will not work, the weave is too loose and will let fruit flies in; organic quilting cotton is a great choice)
  • A large rubber band to hold the fabric on the crock
  • A brew-safe spigot for the crock. Plastic is great, but avoid the metal-look plastic ones, they flake off into the kombucha. We use a brew safe metal spigot (more on problems with metal later in the post)
  • Bottles (swing-top are best, but reusing store-bought kombucha bottles is fine too)
  • Organic Cane Sugar
  • Black, green, and/or white tea (we prefer a 50/50 blend of black tea and gunpowder green tea)
  • A SCOBY, or symbiotic colony of bacteria and yeast (while you can buy these online, it is best to try and find a friend or neighbor that has one they are willing to share with you)
  • Starter tea (if you’re getting your SCOBY from a friend, they will likely give you a cup or two of starter tea to go along with it)

Now that you’ve got the basic materials and ingredients, how do you use them to make your own kombucha and maintain a low-maintenance continuous brew system?

Continuous Brew Kombucha System

First things first, brew your tea. This is not your starter tea that you get with your kombucha, but the plain sweet tea that you add to the starter tea. The size of your crock will determine how much sweet tea you have to make. If you’re using a 2.2 gallon crock, 2 gallons of tea fits perfectly. If you only have 1 cup of starter tea, you should only start with 1 gallon of sweet tea, let that ferment, and on your second batch, bump up to the full 2 gallons. If you’re fortunate enough to get 2 cups of starter tea, you can go with 2 gallons of sweet tea right off the bat.

Everyone uses a different combination of teas to make their own kombucha, but my preferred combo is 50/50 black/green. To be more exact:

To brew the tea, I only use 1/2 gallon of water for all that sugar and tea. In a pot large enough to hold the 1/2 gallon of water, I add the water and sugar. For the loose tea, the easiest method I’ve found is to place a metal fine-mesh colander in the pot and place the loose tea leaves in that. Bring the water to a boil with the tea leaves in it, remove from heat, and let steep for about 30 minutes. This creates a nice, strong tea. Then simply lift the colander out of the tea and discard the tea leaves.

The reason I only use 1/2 gallon of water instead of the full 2 gallons is because I can cool it down faster by adding the remaining 1.5 gallons of cold water. You know how if you add fish to a fishbowl of water that is too hot or too cold it will kill them? Same goes for the SCOBY. The brewed tea needs to be close to room temperature to keep it alive.

Continuous Brew Kombucha System

Once you have brewed your tea and it’s close to room temp, before you start anything else, you must be sure to sanitize everything you’re using. The crock, spigot, bottles, everything. Don’t use dishsoap for this, just hot water and a rinse in vinegar will be just fine. And residual soap will be detrimental to the SCOBY, so avoid using it altogether.

Once everything (your hands included) is sanitized, pour your starter tea and brewed sweet tea into the crock. Learn from me and be absolutely positively sure that the spigot is closed before you pour in your tea. Not 1/2 open, but absolutely closed! Trust me. Very gently, place your SCOBY into the tea, trying to keep it on the top surface. It may sink to the bottom or even just float around the middle, and that’s fine. It will eventually find it’s way back to the top. Place the tight-weave fabric (quilting cotton is actually perfect for this) over the top and secure it with the rubber band.

Continuous Brew Kombucha System

Now you wait. The first fermentation has begun. Side note, I’m a tad bit forgetful (understatement of the year), so I like to write the date I start the fermentation on the side of the crock. A liquid chalk marker is perfect for this. It wipes off easily each time so I can change it with the next batch.

To determine when you should start to bottle the kombucha is a personal preference and also depends on the room temperature. If your kombucha is in a cool or drafty location, the process could take up to 2 weeks. If you have no other options for location, you could wrap traditional twinkle lights (not the new LED ones) around the crock to increase the heat, or get an actual heater meant for this. If the room temperature is too hot (like our kitchen in the summer months), the first ferment will take just days.

After about 3-4 days, I start to taste it. Once the sweetness is mostly gone (but still there just a bit) and the vinegary taste is more prominent, it’s time to bottle. The fastest way to do this is to fill a pitcher (glass is best, but I do use plastic on occasion), then using a non-metal/reactive funnel, pour the kombucha into each bottle. Make sure to leave some space to add about 1-2 ounces of fruit puree or juice if you plan to flavor your kombucha (some flavor ideas are at the end of this post).

Continuous Brew Kombucha System

Once you’ve filled your bottles with kombucha and flavors (and labeled them with that same liquid chalk marker), close them up tight and leave them at room temp for another 3-5 days for the second ferment. This is when that beautiful carbonation process happens. The sugars in the fruit keep the fermentation process going and create bubbly goodness. The higher the sugar content in your fruit (like strawberries), the faster this second ferment will be. After the first 2 days, you may want to “burp” the bottles to get a gauge on the process and make sure they don’t over-carbonate (exploding bottles are no fun!). To burp, just very barely open the top to let out some air and quickly close it. If you get a bunch of fizz very quickly, your second ferment is done. This really shouldn’t need more than 3-5 days.

Once you’ve got a nice second ferment done, place the bottle in the fridge. The cold temperature will stop the fermentation process. Now you’ve got a nice batch of kombucha ready to go all week.

Continuous Brew Kombucha System

But that was just the first batch. How does the “continuous” part of this work? Well, basically the same as the first batch, except that you’re not having to clean and sanitize the crock and spigot each time. When you draw the kombucha off for your first bottling, leave about 1/4 of the kombucha in the crock. This will serve as your starter tea for your next batch. This also means that from here on out, you only need to brew 1.5 gallons of tea each time. This means:

Once you’ve brewed and cooled your tea, remove the SCOBY (with sanitized hands, of course) and set it aside, pour in the tea, and add the SCOBY right back. Done. This should only need to be done once a week, if the temperature is right and your first ferment is done in 5-7 days.

Our Favorite Flavors (so far…)

Add 1-2 ounces of flavor to each 16-ounce bottle

Continuous Brew Kombucha System {our favorite flavors}

Strawberry

2 cups Fresh Strawberries
A bit of Plain Kombucha to thin it out

Cherry

1 cup Tart Cherries (fresh or frozen, thawed)
2 tsp Sugar (to enhance carbonation)
A bit of Plain Kombucha to thin it out

Blueberry Lemon

1 cup Blueberries (fresh or frozen, thawed)
Juice of 1 Lemon
2 tsp Sugar (to counteract the citrus and enhance carbonation)
A bit of Plain Kombucha to thin it out

Mixed Berry

1 cup Mixed Berries
Juice of 1 Lemon
1 tsp Sugar (to counteract the citrus and enhance carbonation)
1″ Grated Ginger
A bit of Plain Kombucha to thin it out

With all the fruit purees I make, I strain them through cheesecloth, a nut milk bag, or a metal mesh strainer. It’s okay to use metal at this step because it is not coming in direct contact with the kombucha itself. Straining the puree makes the texture of the end product much more palatable, so you don’t have chunks of fruit or seeds to contend with.


If you’ve made it this far and want to see most of what you’ve just read, check out our FB Live video on our Continuous Brew System.


Helpful Info

  • For more info, tips, advice, experiences, failures, success, and new flavors, be sure to follow along on Instagram using the hashtag #OPLkombucha.
  • Metal should never come in contact with kombucha or the SCOBY. It is okay to brew the tea in a metal pot, or to strain the fruit puree in a metal mesh colander, but the kombucha itself cannot touch metal. The exception to this rule is stainless steel with no lead in it. We do use a metal spigot and the flow rate is phenomenal!
  • After you’ve been brewing a while, your SCOBY will get pretty big. It grows a new layer with each batch. Peeling off layers and keeping them in a “SCOBY hotel” (a smaller crock with extra sweet tea to keep them from drying out, cover with a tight-weave fabric just like the brewing crock) is a good way to hang on to extras in case something causes yours to die, you want to expand your system, or you have a friend that would like to begin brewing their own.
  • Get creative with your flavors. Fruits with low sugar content may need a boost with a teaspoon or two of sugar to help the second ferment get the kombucha bubbly enough. Adding sugar is not creating a sugary drink, it is aiding in the secondary fermenting process to create the carbonation.
  • Citrus will kill the carbonation in the second ferment, so pair citrus with high-sugar fruits or add a teaspoon or two of sugar to aid in the carbonation of the secondary ferment.
  • Kombucha ferments faster in warmer temperatures but try to keep it out of direct sunlight.
  • If you notice a large layer of yeasty buildup in the bottom of the crock after a long time (I’m talking many months up to a year), you can remove the remaining tea after a bottling session and the SCOBY, and resanitize everything, removing the extra buildup in the process. It’s like spring cleaning.
  • SCOBYs don’t last forever. When it starts to get big (think a couple inches), peel off the top layer and either throw it in the SCOBY hotel, or repurpose it. There are a few ideas floating around on Pinterest (none of which I have tried yet), but I prefer to feed it to my chickens. They LOVE it and it’s such a great treat for them.
  • If your SCOBY is on it’s last leg or has already died, here are some signs to look for:
    • a change in texture (like turning leathery or gummy);
    • mold, fuzzy/green/blue/white/red/etc but not the stingy brown stuff that’s normal on a SCOBY from the tannin in the tea (you will have to restart the entire system if you find mold, sanitizing everything);
    • the SCOBY no longer floats back up to the top of the crock

And just for fun, if you’re curious like I was, here is the cost breakdown per bottle of homemade kombucha. This does not take into account the cost of the startup supplies, including bottles, because they are reusable for many, many years.

This is only the cost of ingredients for the plain, unflavored kombucha (since the various fruits/flavors are variable costs).

Total Cost: $2.08 for 1.5 gallons

1.5 gallons = 12 bottles of plain, unflavored kombucha = $0.17/bottle

SEVENTEEN CENTS! $0.17 for the actual kombucha. Just for fun, let’s round that up to $0.30 per bottle with flavor added, which I really don’t think it’s that much the majority of the time. If you drink a bottle a day for an entire year, that’s $109.50/year per person. Compare that to store-bought every day for a year: $1095 – $1825/year per person. Just in case you needed a little more convincing that this is absolutely worth it. Plus, it’s so satisfying knowing that you are in complete control of what you’re consuming.

Continuous Brew Kombucha System

Do you have any tips, advice, personal experiences, or questions about home brewing kombucha? Share them in the comments. I’d also love to hear some of your favorite flavor combinations.
Vanilla Peach Fruit Leather {honey-sweetened; real fruit}

$
0
0

Peach Fruit Leather {honey-sweetened; real fruit}

Peach Fruit Leather {honey-sweetened; real fruit}

Peach Fruit Leather {honey-sweetened; real fruit}

Peach Fruit Leather {honey-sweetened; real fruit}

Peach Fruit Leather {honey-sweetened; real fruit}

Peach Fruit Leather {honey-sweetened; real fruit}

Peach Fruit Leather {honey-sweetened; real fruit}

Peach Fruit Leather {honey-sweetened; real fruit}

For Labor Day weekend, our family took our last camping trip of the season. Just before we left, I realized I still had over 2 dozen peaches that would go bad if we left them at home for the 4 days we would be gone. So with 2 days to spare, I made as much as I could with those peaches.

Peach Fruit Leather {honey-sweetened; real fruit}

I made peach cake, peach jam (recipe coming soon!), and these peach fruit roll-ups. We ate all the cake before we left, but brought the jam and fruit leather (as well as some remaining fresh peaches) with us on our camping trip. The jam was so perfectly delicious on our pancakes, we didn’t even need maple syrup (which was good because we ran out of it).

Peach Fruit Leather {honey-sweetened; real fruit}

The kids loved being able to just grab a fruit leather whenever they felt like it, and I didn’t mind at all because it was just peaches and honey. Doesn’t get much more clean than that.

Peach Fruit Leather {honey-sweetened; real fruit}

Peach Fruit Leather {honey-sweetened; real fruit}

Recipe: Vanilla Peach Fruit Leather {honey-sweetened; real fruit}

By Kendra Benson  , , ,   , ,

September 9, 2016

When life hands you peaches, make peach fruit leather. It's the best way to preserve that delicious flavor so you can enjoy it long after peach season is over.

View more images and read the blog post

  • Prep: 10 mins
  • Cook: 12 hrs

Ingredients

5-6 Ripe Peaches, pitted

2 Tbsp Honey (or more to taste)

1 Vanilla Bean (seeds scraped) or 1 tsp Pure Vanilla Extract

Directions

1If you choose to peel your peaches, you can follow the easy steps I've outlined here. I choose not to peel the peaches for this fruit leather for the sake of ease and time. I don't notice them once they're pureed so it's simply personal preference.

2In a high powered blender (like a Blendtec) or the bowl of a food processor, add your peaches (remember to remove the pits). Blend until the peaches are pureed and smooth (if you left the skin on, there will still be bits and pieces left, and that is completely fine). There should be no chunks.
3Add the honey and vanilla to the peaches and process again to fully incorporate. Taste to be sure it's sweet to your liking. The flavor will intensify some after they're dehydrated, so keep that in mind.
4Line 3-5 dehydrator trays with parchment paper (not wax paper or foil) or sheets specifically made for your dehydrator (this is preferred).

5Spread the pureed mixture smoothly and evenly on the trays, leaving at least an inch all the way around. The puree should be about 1/8" - 1/4" thick (the thicker it is, the longer it will take to dehydrate, but the thicker your final product will be).

6If your dehydrator has temperature settings, set to 110°F (or the lowest setting) and let dry for 8-12 hours. Check periodically after 8 hours. The edges will dry first. Rotate trays if needed to ensure even drying.

7When you are able to easily peel the fruit leather completely from the trays, remove from the dehydrator and place on a parchment sheet (or use the one from the dehydrator if you didn't have dehydrator sheets. Using kitchen shears or clean scissors, trim the edges and cut the fruit leather into 2" strips (while still attached to the parchment). Roll and secure with tape or twine.

8Store in an airtight container at room temperature.

00:00

Subscribe & get recipes in your inbox.

Applesauce Fruit Leather {no added sweeteners}

$
0
0

Apple Fruit Leather {no sweeteners added}

Apple Fruit Leather {no sweeteners added}

Apple Fruit Leather {no sweeteners added}

Apple Fruit Leather {no sweeteners added}

Apple Fruit Leather {no sweeteners added}

Apple Fruit Leather {no sweeteners added}

Apple Fruit Leather {no sweeteners added}

I’ve been on a dehydrating kick lately. When we had an overflow of peaches so I made fruit leather with them, as well as dehydrating slices (so good, by the way). The fruit leather was a hit with the kids, but I ran out of peaches, and wanted to use what I already had on hand.

Apple Fruit Leather {no sweeteners added}

In addition to using what we already had, I wanted it to be easy. Doesn’t get much easier than using already-pureed food. We purchase our applesauce in 4-packs from Costco. I’m a big fan of cost breakdown, and based on the current price of the TreeTop Applesauce, these fruit leathers come out to about $0.15/piece.

Apple Fruit Leather {no sweeteners added}

The best part is that you can flavor these with anything you want, or just leave them completely plain. Dehydrating brings out the apple flavor so it’s not bland, and it concentrates the sweetness so there is no need for extra sweeteners, just pure fruit.

Apple Fruit Leather {no sweeteners added}

Plus, they look adorable all stacked up in little rolls, just waiting for their place in a lunchbox.

Apple Fruit Leather {no sweeteners added}

Apple Fruit Leather {no sweeteners added}

Recipe: Applesauce Fruit Leather {no added sweeteners}

By Kendra Benson  , , ,   , ,

September 15, 2016

Perfectly flavored and soft, these applesauce fruit leathers are the perfect snack for kids and are so easy to make.

View more images and read the blog post

  • Prep: 10 mins
  • Cook: 12 hrs

Ingredients

2 cup Unsweetened, Unflavored Applesauce

(optional) Flavoring of your choice (choose one):

  • 1 tsp Vanilla Extract
  • 1 tsp Cinnamon
  • 1 tsp Pumpkin Pie Seasoning

Directions

1If adding a flavoring, mix it in completely to the applesauce.

2Line 3-5 dehydrator trays with parchment paper (not wax paper or foil) or sheets specifically made for your dehydrator (this is preferred).

3With an offset spatula, spread the pureed mixture smoothly and evenly on the trays, leaving at least an inch all the way around. The puree should be about 1/4" thick (the thicker it is, the longer it will take to dehydrate, but the thicker your final product will be). Use the flat side of the spatula to create flat edges.

4

5If your dehydrator has temperature settings, set to 110°F (or the lowest setting) and let dry for 8-12 hours. Check periodically after 8 hours. The edges will dry first. Rotate trays if needed to ensure even drying.

6When you are able to easily peel the fruit leather completely from the trays, remove from the dehydrator and place on a parchment sheet (or use the one from the dehydrator if you didn't have dehydrator sheets. Using kitchen shears or clean scissors, trim the edges and cut the fruit leather into 2" strips (while still attached to the parchment). Roll and secure with tape or twine.

7Store in an airtight container at room temperature.

00:00

Homemade Larabars Paleo (Chocolate Chip Cookie Dough)

$
0
0

Chocolate Chip Cookie Dough Bars | Our Paleo Life

Chocolate Chip Cookie Dough Bars | Our Paleo Life

Chocolate Chip Cookie Dough Bars | Our Paleo Life

Chocolate Chip Cookie Dough Bars | Our Paleo Life

Chocolate Chip Cookie Dough Bars | Our Paleo Life

Chocolate Chip Cookie Dough Bars | Our Paleo Life

Chocolate Chip Cookie Dough Bars | Our Paleo Life

Homemade Larabar Recipe

A look in to the history of the Larabar:

Lärabar was created by Lara Merriken, she was wanting to create a “very healthy product that tasted delicious”. On the General Mills website, it’s written that her inspiration for larabars occurred during a hiking trip in 2000, in Colorado (of course). She thought to make a food bar that was made out of only fruits, nuts and spices. The larabar was available commercially in 2003.

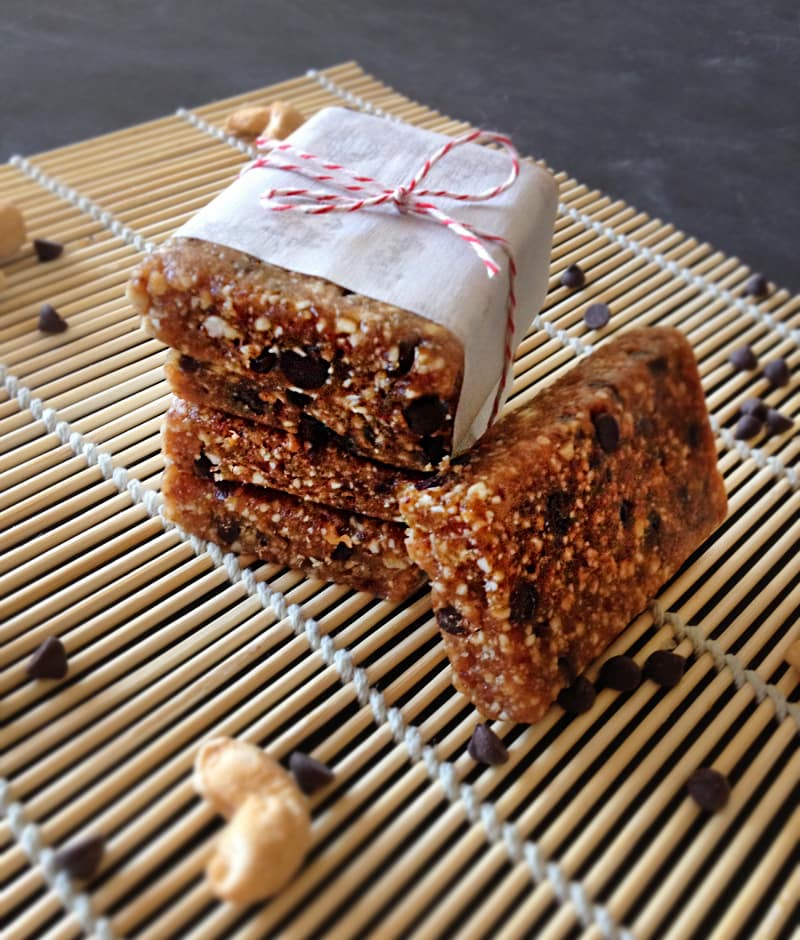
Clean Ingredients for Paleo Larabars

  • Cashews (I used roasted/salted)
  • Medjool Dates, pitted
  • Sea Salt
  • Chocolate Chips (we use the Enjoy Life brand)
Homemade Larabar Recipe

Back in our pre-paleo days, I had perfected the chocolate chip cookie. The secret was the salt. You had to have the right ratio of salty to the sweet. The same goes for these bars. If you leave out the salt, you will be sorely disappointed.

Larabars Paleo

The thing I love most about these homemade Larabar recipes (don’t forget to try the Apple Pie Bites, they are my favorite!) is that they require very little ingredients. Why bother paying a buck a bar at the store when you can make them fresh at home and in any flavor combination you want?


Copycat Chocolate Chip Cookie Dough Larabars
 
Prep time
Total time
 
Author:
Serves: 8
Ingredients
  • 1-1/2 cup Cashews (I used roasted/salted)
  • 18 Medjool Dates, pitted
  • ½ tsp Sea Salt
  • ½ cup Chocolate Chips (we use the Enjoy Life brand)
Instructions
  1. Pour the cashews, dates, and salt in the bowl of a food processor.
  2. Process until mixture resembles coarse gravel.
  3. While the processor is running, add a thin stream of water, about 1 tsp, maybe less depending on the moistness of your dates.
  4. Stop the processor and check the mixture inside. If it sticks together when you smush it, then you've got the right consistency. If it's still crumbly, add more water. You don't want to add too much water because the bites will be too sticky.
  5. When you've got the right consistency, add the chocolate chips. Mix by hand (this may require a bit of elbow grease).
  6. Press mixture into a parchment-lined 8x8 baking pan. Chill in the refrigerator about 30 minutes or until firm.
  7. Use parchment flaps to lift the bars out of the pan and cut into bars. Makes 8 bars, depending on what size you cut them.
  8. Store in an airtight container in the refrigerator for a week or so, if they last that long.
 
Viewing all 77 articles
Browse latest View live


Latest Images